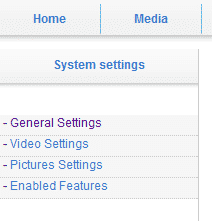
We will show you in a few simple steps how to manage the basic settings of your phpMotion based website.
The first step is to login to the administrator back-end of your phpMotion:
https://yourdomain.com/siteadmin/
When you are logged in the right menu will be already selected and it is “Home”:

Right under it you will see a list of the “Settings” menu function, which will be loaded.
The first function we will explain is the “General Settings”. These functions allow you to fine tune your phpMotion conversion settings and also to change your SiteName:

As your phpMotion is already working fine the “Site Base URL” should stay as it is. Another important section here is the one under which the paths to the system binaries required for the upload to function are listed:

The paths in the screenshot may not be correct for the server which is hosting your account. If the upload or the conversion functions are not working you may contact your host to provide you with the correct information. If your account is hosted with TMDHosting you may create a ticket and our technical support will get you the right information within minutes.
If you are just starting to use phpMotion you should leave all the conversion configurations to the default settings.
The best link here is the “Video Settings” and “Pictures Settings”. You may configure the quality and size of the videos and the images you will be uploading via these tabs. Again it is highly recommended to leave these to the default settings if you have just started phpMotion. Of course you may play with the configurations to test these before you start building the website.
The last menu here is the “Enabled Features” and it will allow you to switch on/off the functions for your website. You may want to disable audio uploads for an example and this is the place where you may complete that task. The developers create these few menus pretty self-explanatory and you will need just a glimpse in them in order to add/remove what you need.
