How to upload a course in Moodle
Hello. In this article we will show you how to upload a course through your Moodle Dashboard.
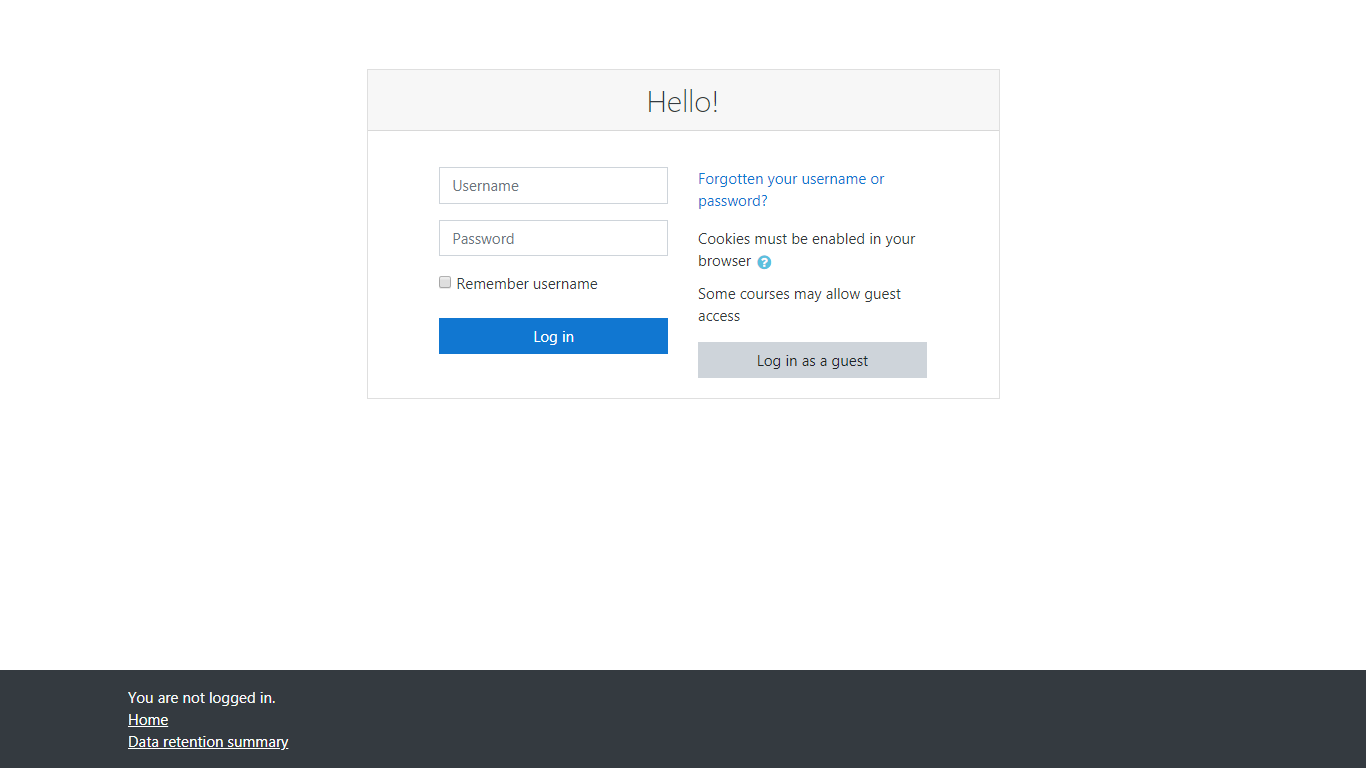
First, you would need to log into your Moodle Dashboard:
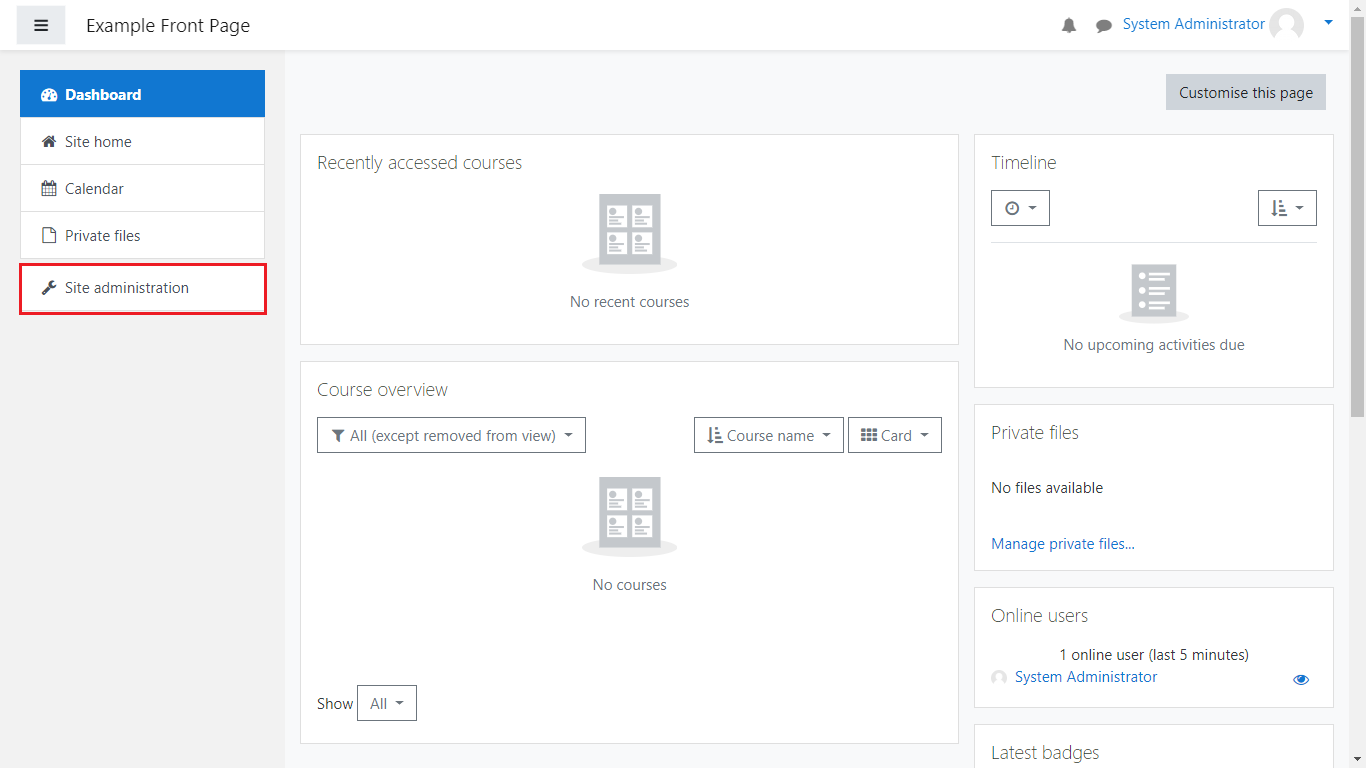
Once you have logged in, click on “Site administration”.
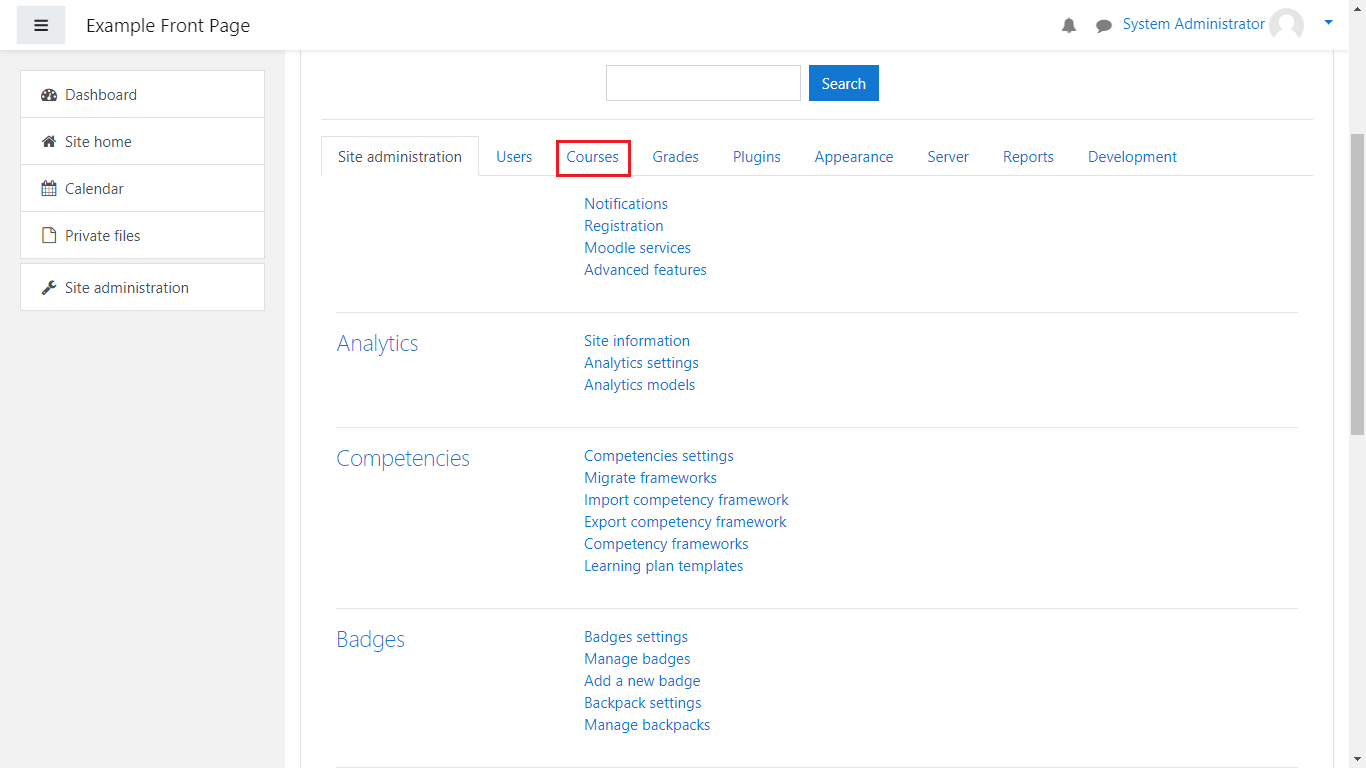
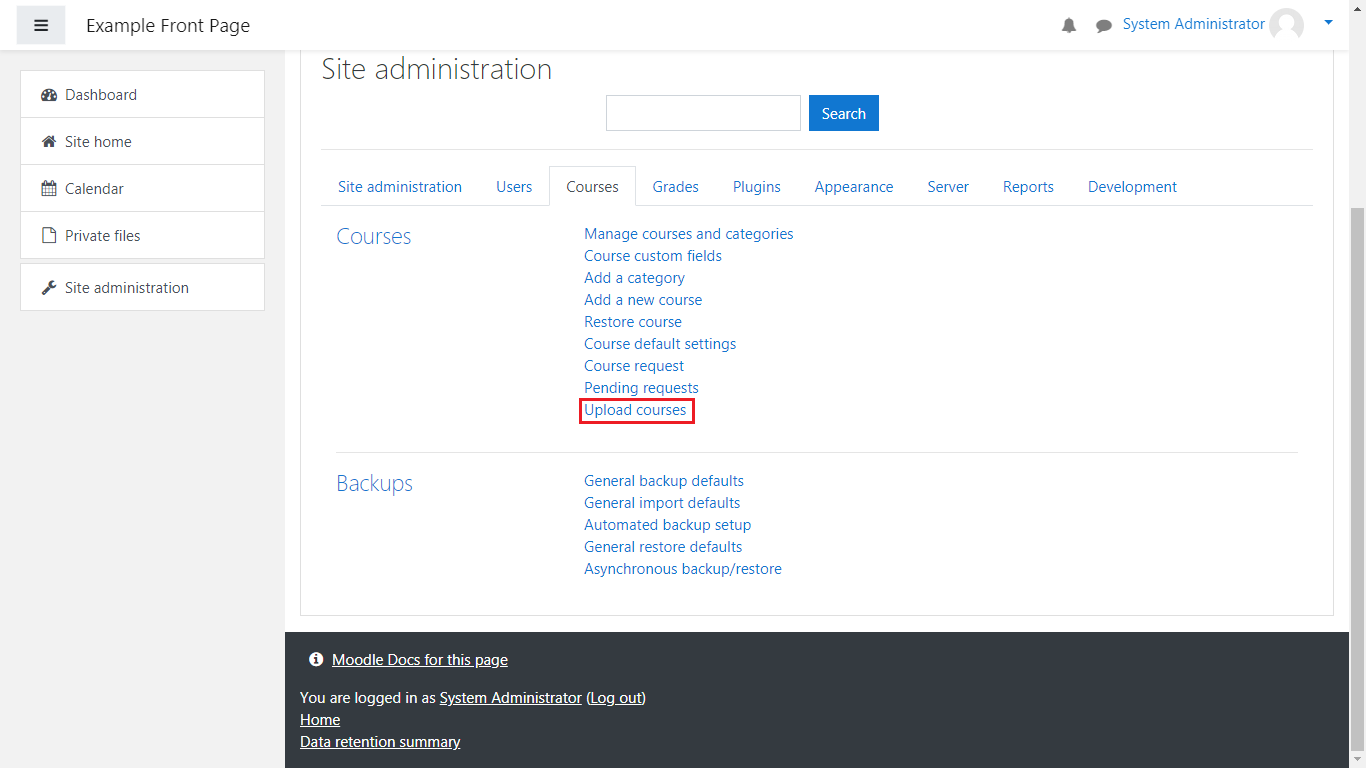
From there, select “Courses” and “Upload courses”:
Once you’re there, you have two options: Either select the file from your local device or drag and drop it:
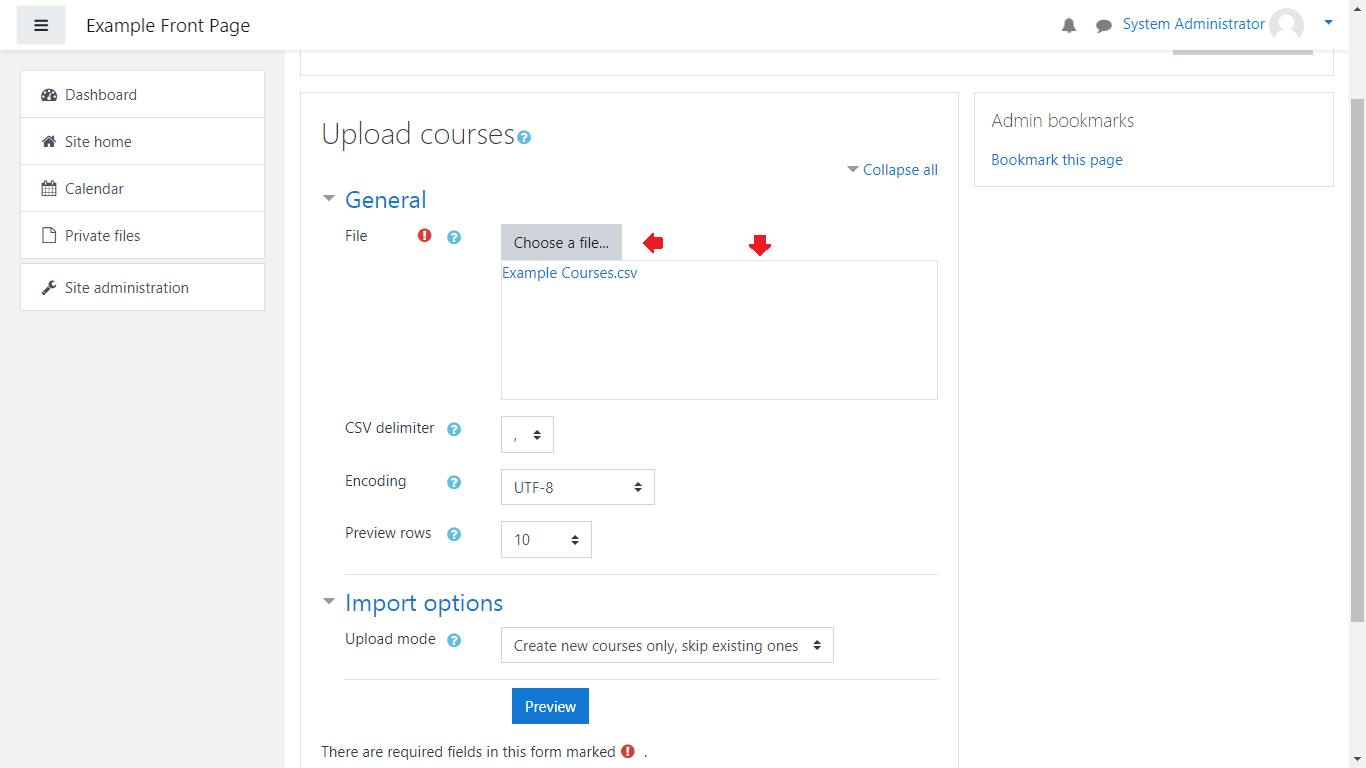
(Note: All course files must be in the .csv file format(comma separated values format))
What is a CSV File?
The CSV(Comma Separated Values) File is a plain text file which contains a list(collection) of data.
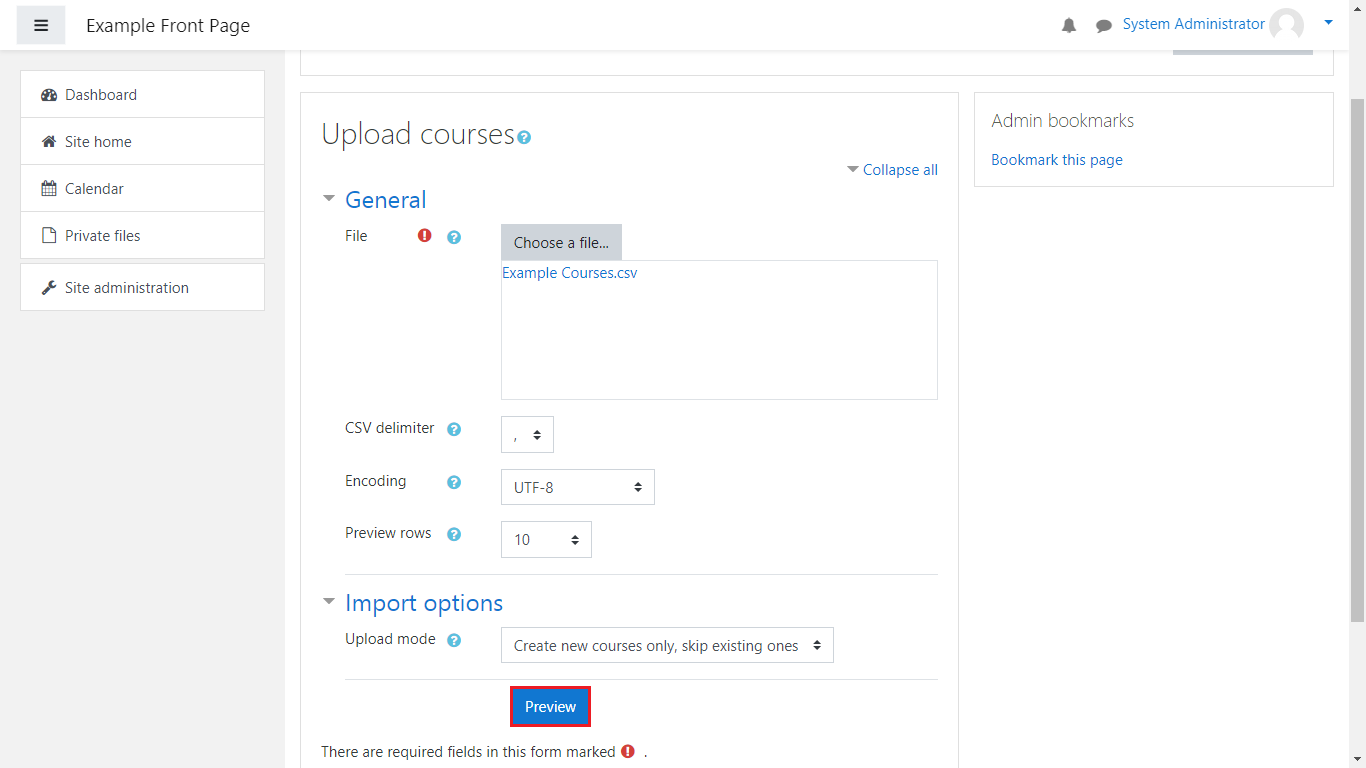
Once you’ve uploaded the file, click on the “Preview” button:
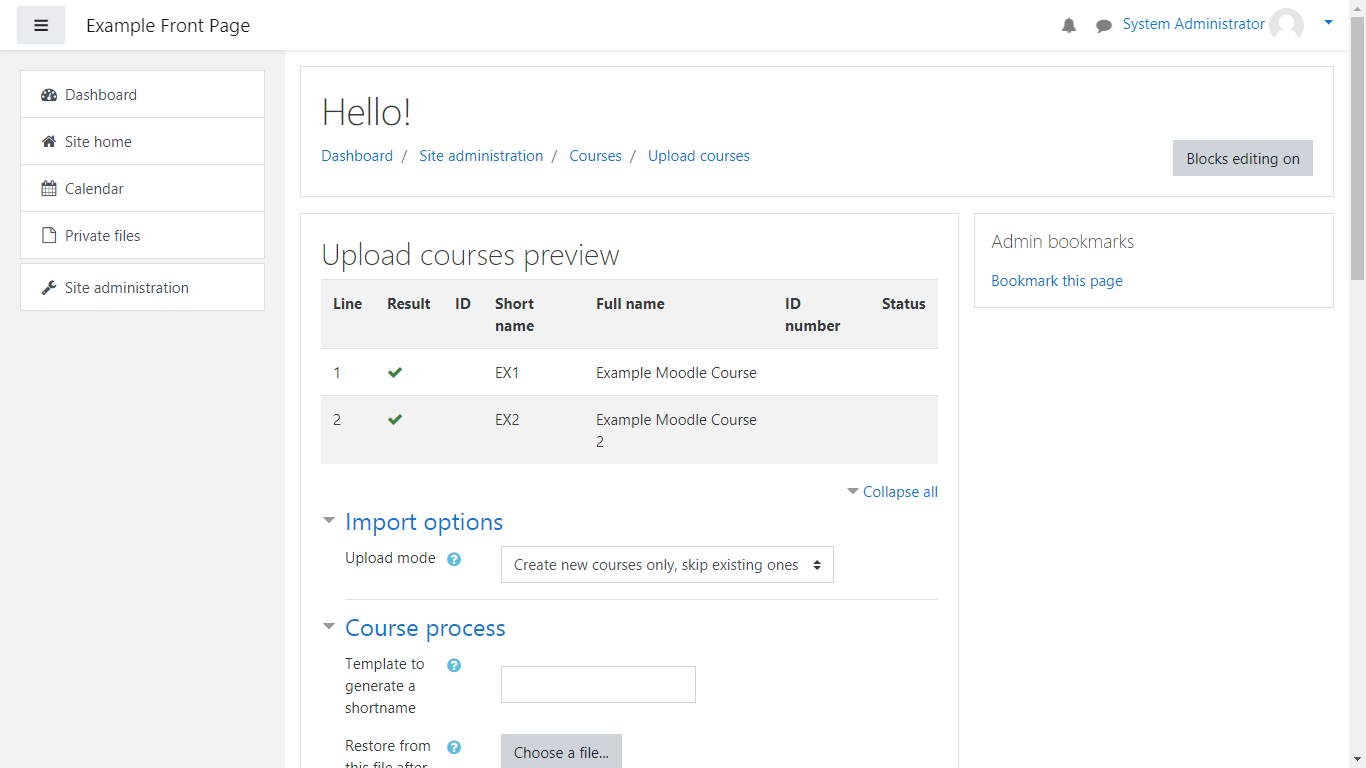
From there, you’ll be shown an overview of the courses as well as options/values for the courses:
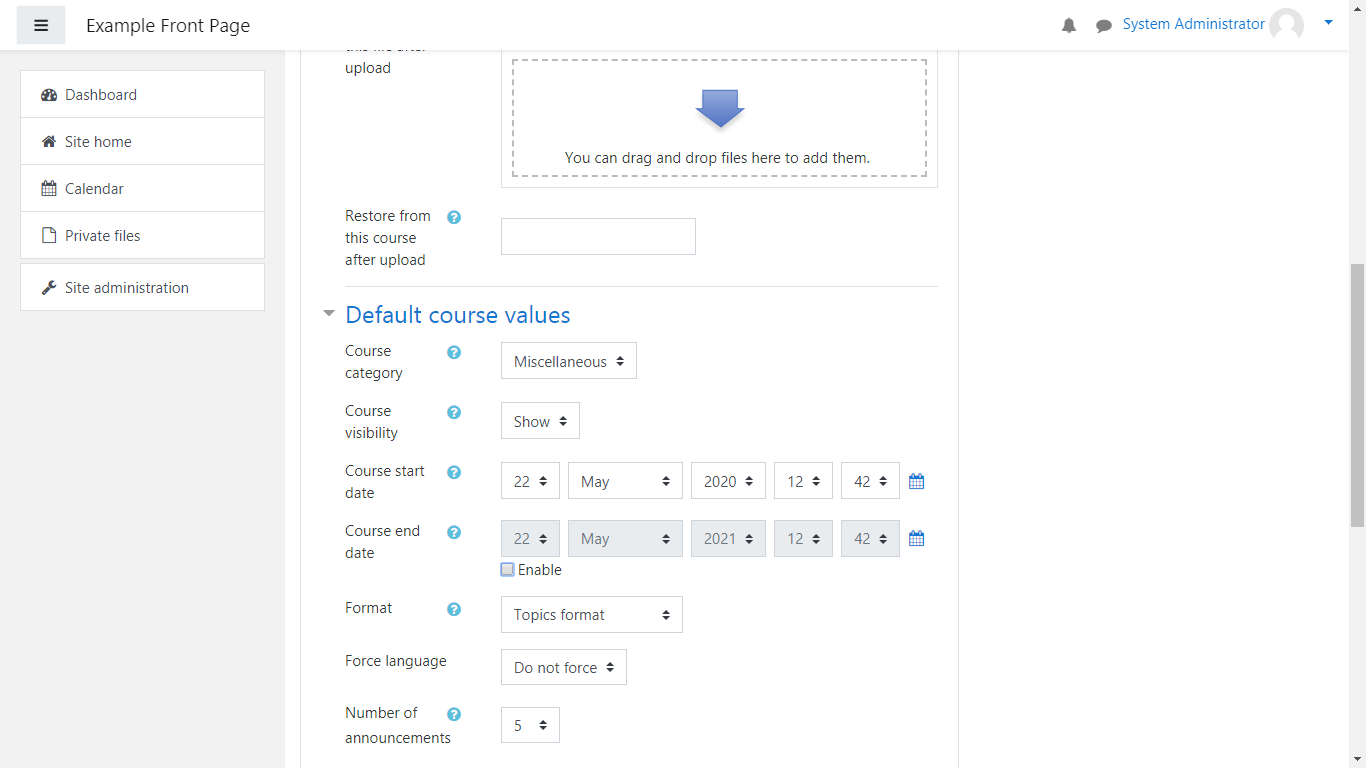
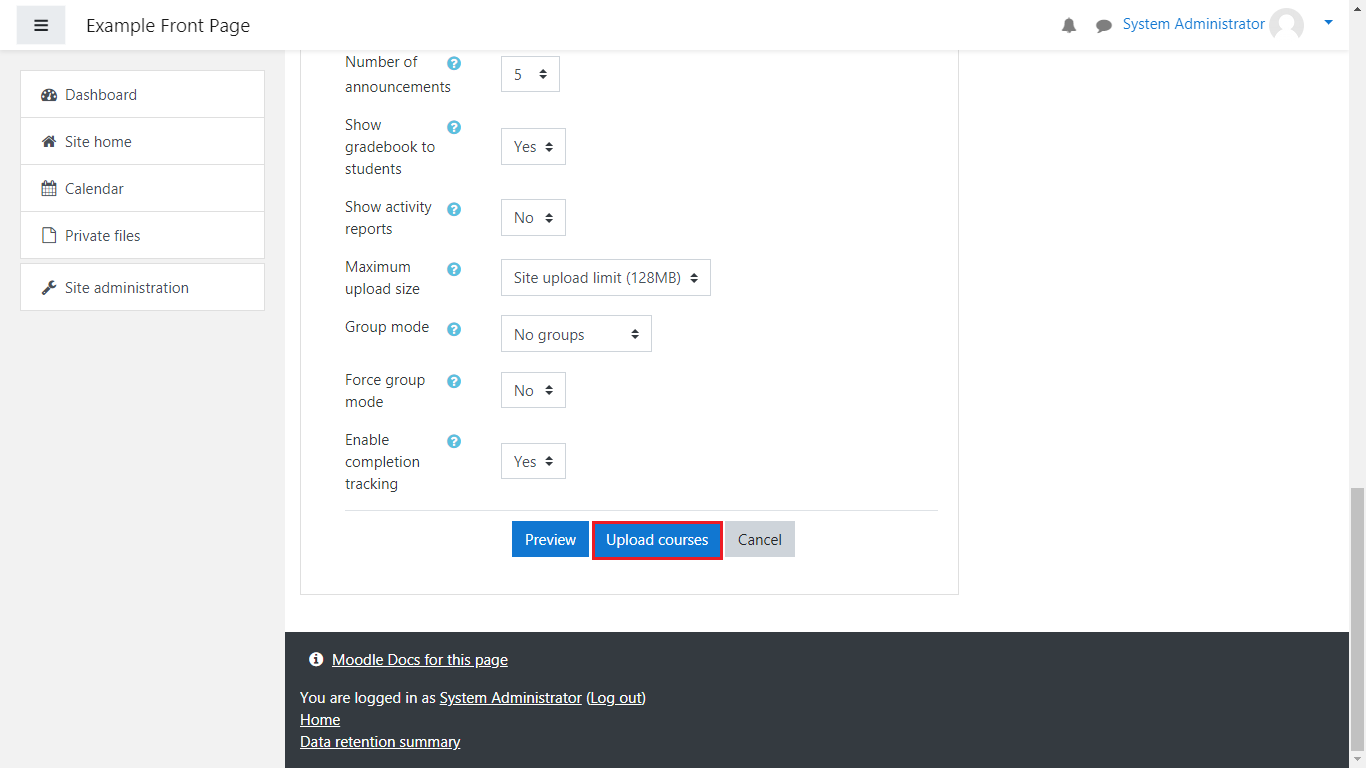
Once you’ve customized your course(s), scroll down to the bottom of the page and click on “Upload courses”:
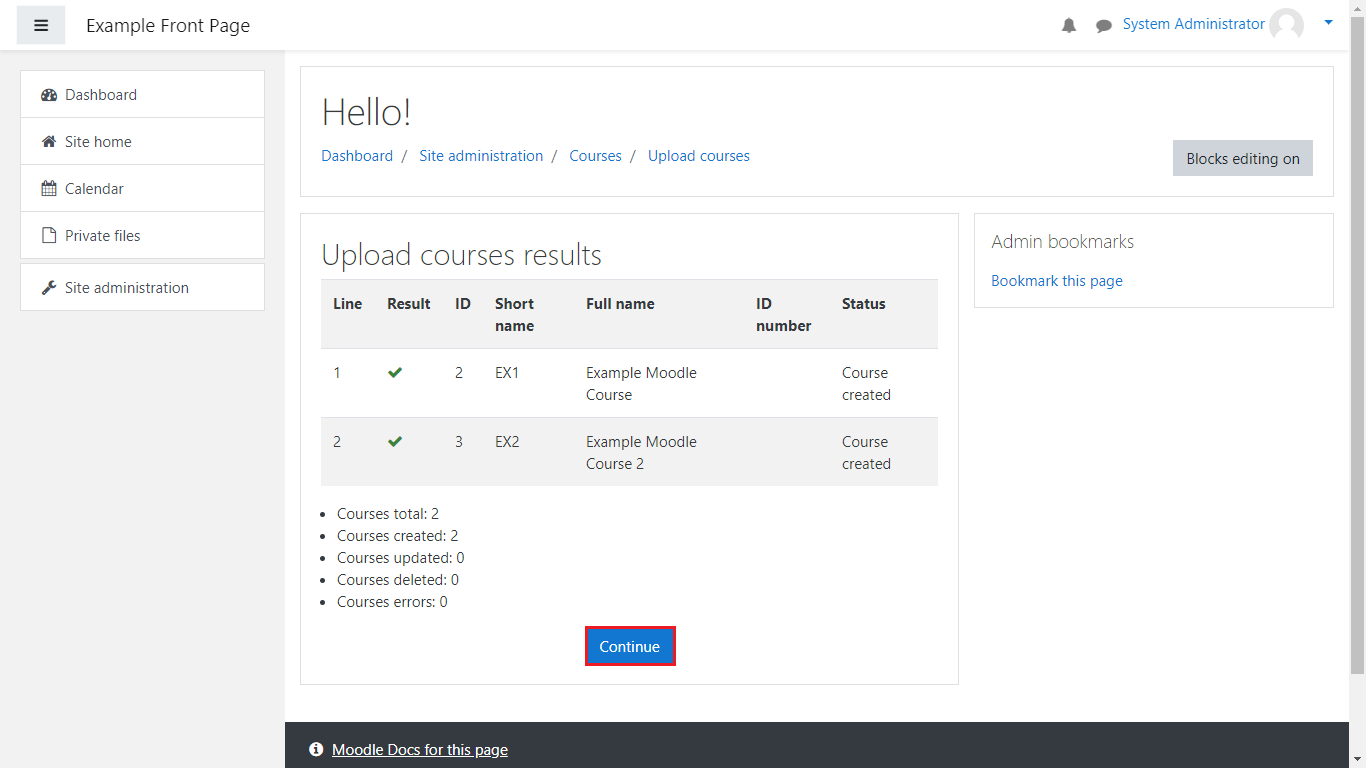
Once you’ve done that, you’ll be taken to the results page, informing you which courses were created/updated/deleted and how many course errors have been met. After you’ve reviewed the information, click on “Continue”:
Congratulations, you successfully learned how to upload your courses in Moodle. We hope this article was helpful to you. Good luck!
