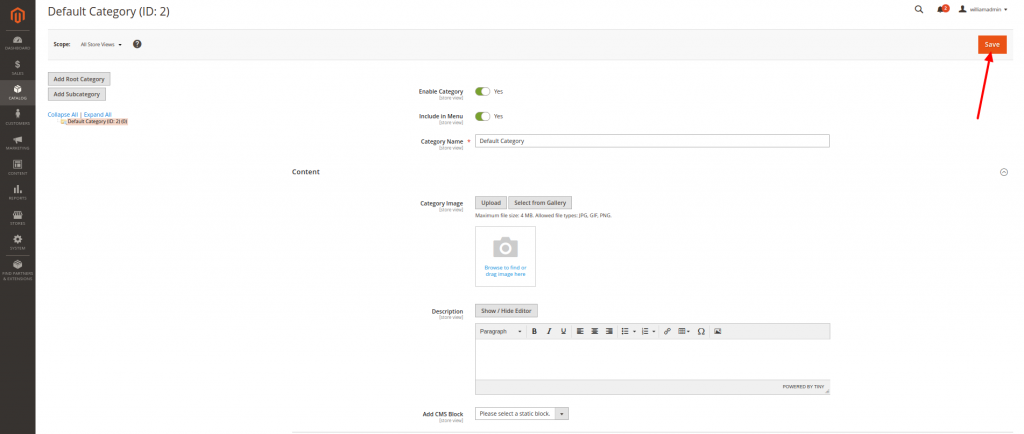
In this section of our Magento Tutorials we will cover the basics of creating and managing Categories in the Magento E-Commerce Application.
One of the main features of Magento is adding Products and easily organize them in different categories, so that your clients can easily locate the Product that they are looking for in your online store.
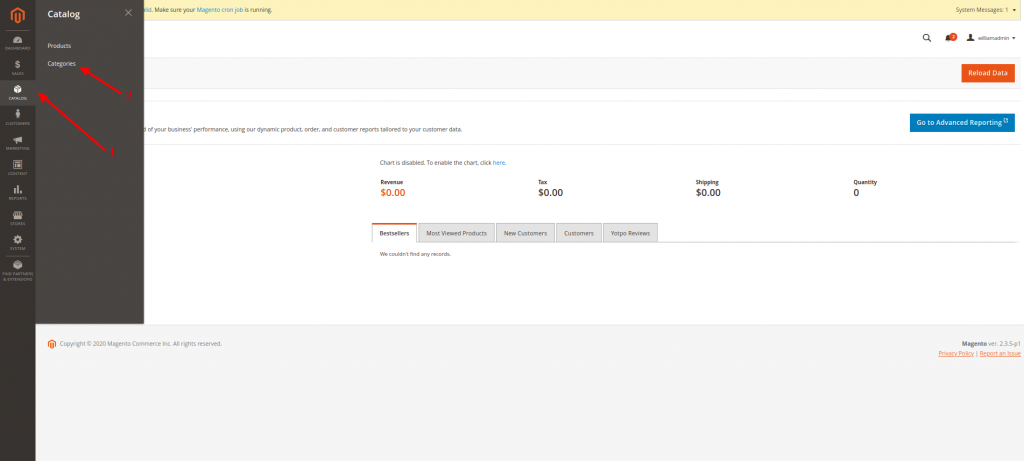
The first step would be accessing your Magento Admin Area Dashboard and navigating to Products (1) > Categories (2):
This will take you to a new Page, where you can see the Category Tree (1) and the options to Create a New Category (2) or a Sub-Category (3):
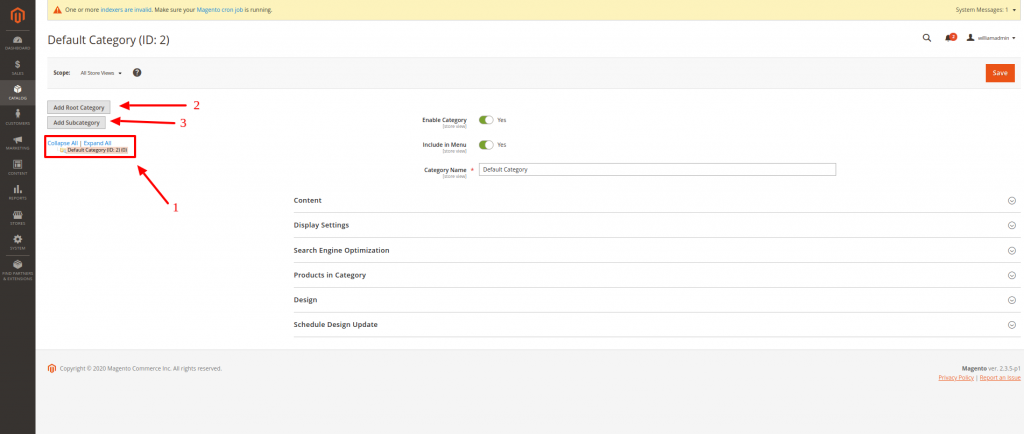
Since we do not have any Categories created yet, at this point, you will only see the “Default Category” in the Category Tree, and its’ options will be selected by default. And for the purpose of this Tutorial, we will only cover the options available when editing the Default Category. Creating a new one works in a similar way, once you familiarize yourself with the available options here.
As you can see from the available options, you can Enable/Disable the Category, Include it in your Main Menu, and change the Category Name from here. The other Options that you have available are within their own separate sections and we will cover them one-by-one in this tutorial.
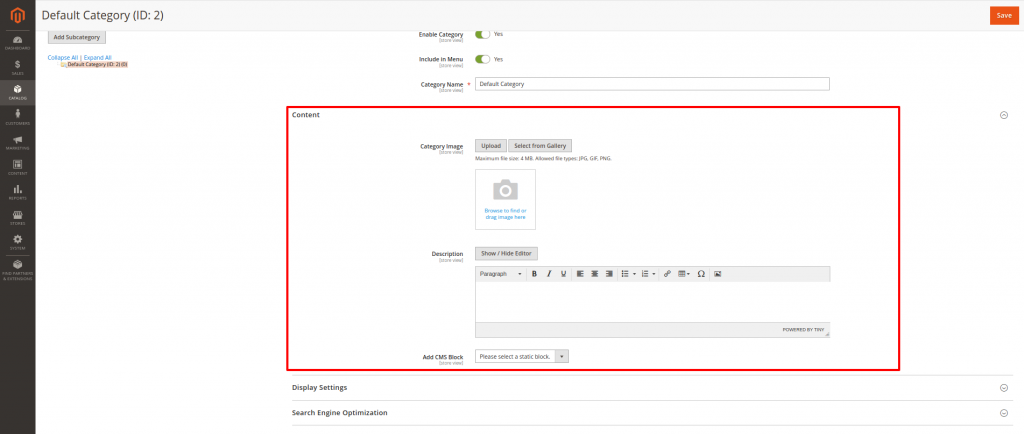
The first available Section is related to the Content of that Category. Here, you will be able to add a Category Image and a Short Description of the Category:
The next Section is the Category Display settings:
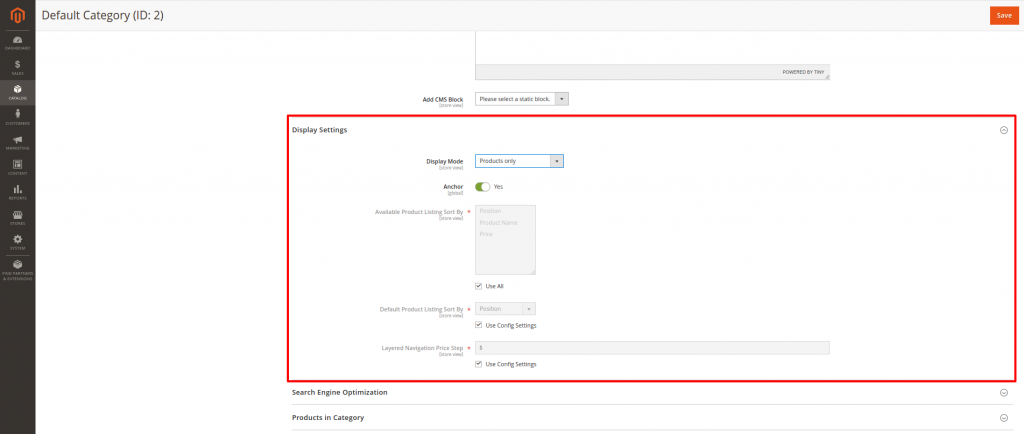
The options that you have available here are the following:
- Display Mode – Whether you wish to display both your Products and Static Blocks or only one of those in this Category
- Anchor – This is the feature that allows you to display Attribute Filtering in this category. We have covered how to create new Attributes and Attribute Sets for your Products in another Magento Tutorial and what is their function
- Available Product Listing Sort By – Here you can specify the exact filters that your Clients can use to sort your products in this category by, for instance, Product Name, Price, etc.
- Default Product Listing Sort By – The default sorting of your Products in this category, for instance, you can set this to display your newest Products in this category first, or sort them by Price descending or ascending, depending on your preference
- Layered Navigation Price Step – The Price step with which products are sorted by in the Category, if the Products are filtered by price. If you leave this option Blank, it will use the default Magento Price Step, which is 10, 100, and 1000 depending on the price of your Products
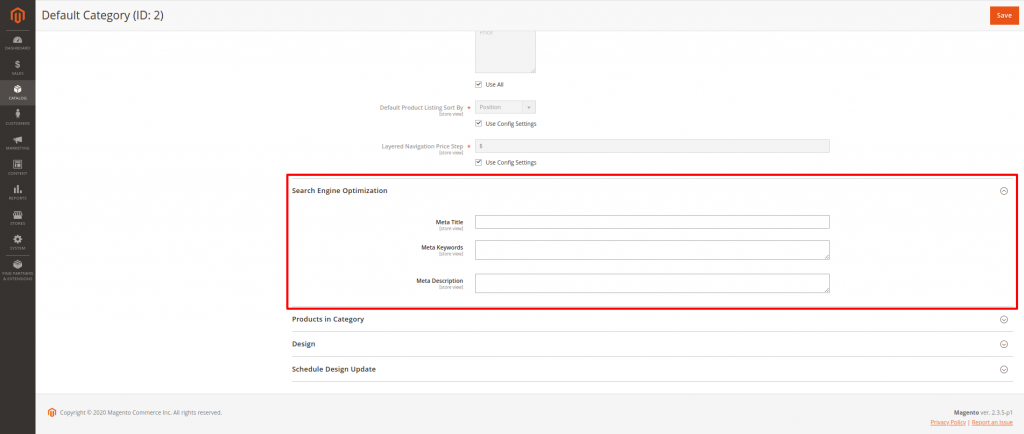
The next section that you have available is the Search Engine Optimization, where you can set your Category Meta Tags, in order to improve the visibility of your website on the web and improve the indexing of your Categories by the Search Engines:
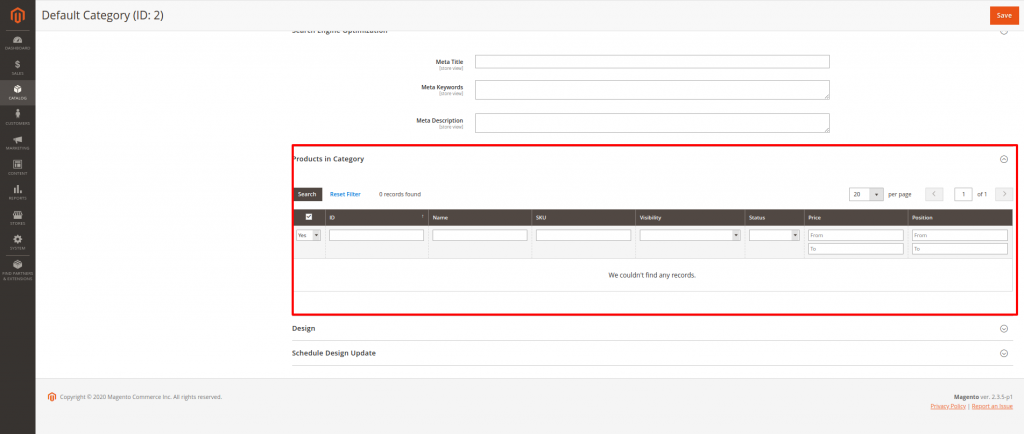
The next available “Products in Category” Section, allows to Manage the Products available in this category. When you create a new Product, you have the option to assign it to a Category, therefore, you can review our Tutorial for creating Magento Products in order to understand the process. In here, you will be able to manage the Products available in the currently selected Category. Once again, since we are using a new Magento Installation, there are no Products in place, however, they should be displayed here, if you have products in this specific category:
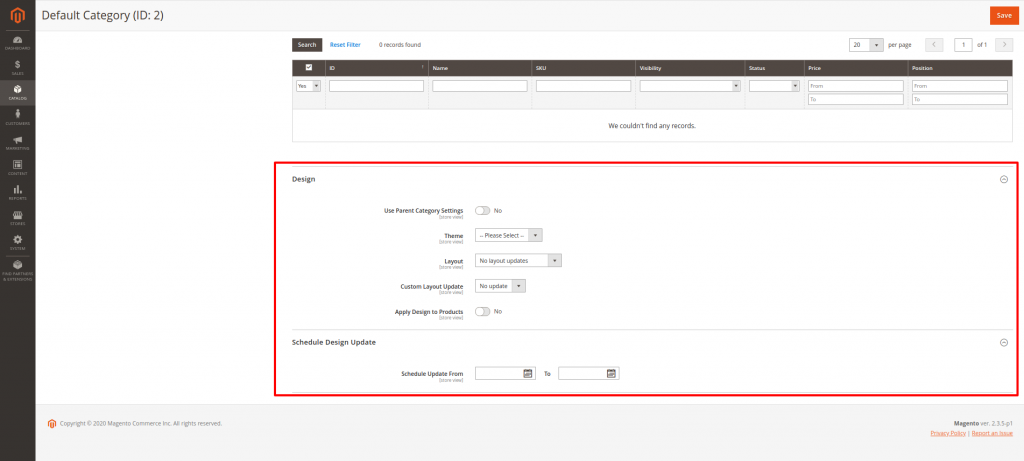
And finally, you have Design and Schedule Design Update Options, that will allow you to change the overall cosmetic look of your category, the options that you have available are the following:
Once you are ready with the changes under the specific category, do not forget to click on the Save Button on the top right corner of the page, in order for the changes to take effect:
