In this tutorial you are going to learn how to add new content to your ImpressCMS website. First, you will need to login to the admin area of your website. If you have installed ImpressCMS in the public_html folder of your account, you can access the admin area using:
https://yourdomain.com/admin.php
If you have installed ImpressCMS in a subfolder of public_html, for example in/public_html/cms/, you should access the admin area using:
https://yourdomain.com/cms/admin.php
Once you have logged in the admin area click the “Content” icon under “Installed Modules”:

Note: If you have not enabled the module upon installation of ImpressCMS, you can enable it through the “modules administration” page.
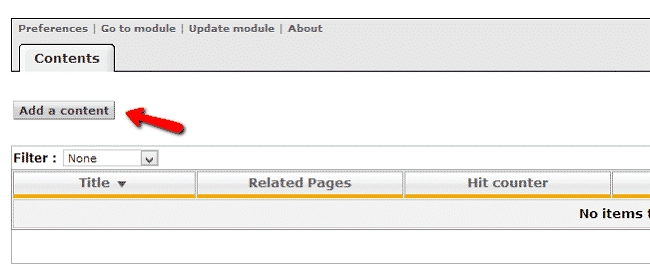
In the “contents” page click on the “Add Content” button:

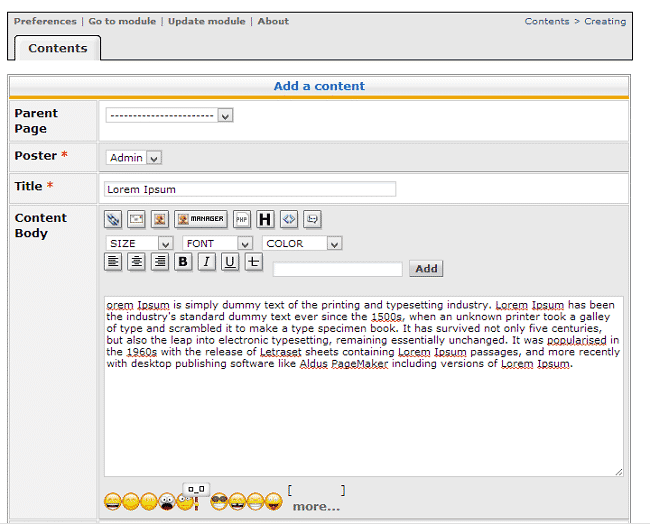
The next page is where you input and configure your new content. You will need to enter information in the following fields:
Parent Page select if the page will have a parent page or not
Poster – the user that posts the content
Title
Content Body – this is where you input your content that will be shown on the site
Custom CSS – input custom css for that content to personalize the page
Tags – make sure to separate your tags with commas
Show Link in – using the dropdown menu select if the page should have link in the menu or any related pages
Weight – the order in which the content will be shown. Zero means first
Status – select if the content will be published or not
Create symlink – mark yes or no, depending on whether you wish for ImpressCMS to create a symlink for that content
Show Related Pages
Can Comment ? – the option enables comments on that page
Meta KeyWords – enter the metakeywords for your article
Meta Description – enter the description of your article in a few words
Short URL – for SEO purposes you can setup URL for that article
View Permission – setup the group of users that can view your page

When you are done click the “Submit” button to save the changes. You can now check how your page looks by going to its URL:
