The Product is the centerpiece for any online shopping platform. It is so for CS-Cart as well. As the items can be physical ones, digital ones or a service, this script allows you to manage any of these with ease.
In this part of the tutorial we are going to focus on the process of creating and managing products for CS-Cart. This procedure is actually quite similar to the one of creating and managing a Category, where we have referenced the process of adding a product as well. If you have not gotten familiar with the procedure – we do highly recommend you to visit our Category Management section, as it would make it easier for you to create a variety of categories and subcategories, where you can group your products in, as well as get familiar with the processes, involved.
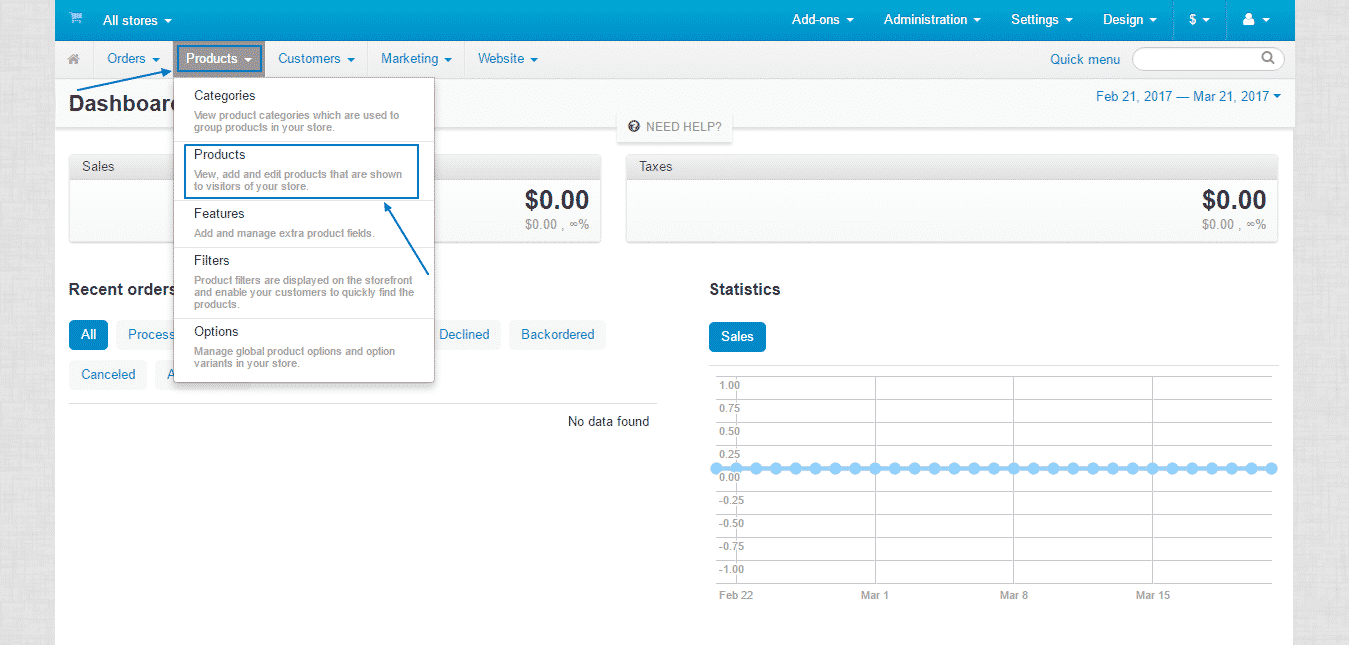
To start creating a new one from scratch, you first need to login into your Administration Panel. Then, you have to navigate to Products > Products option from the drop-down menu, which will appear:
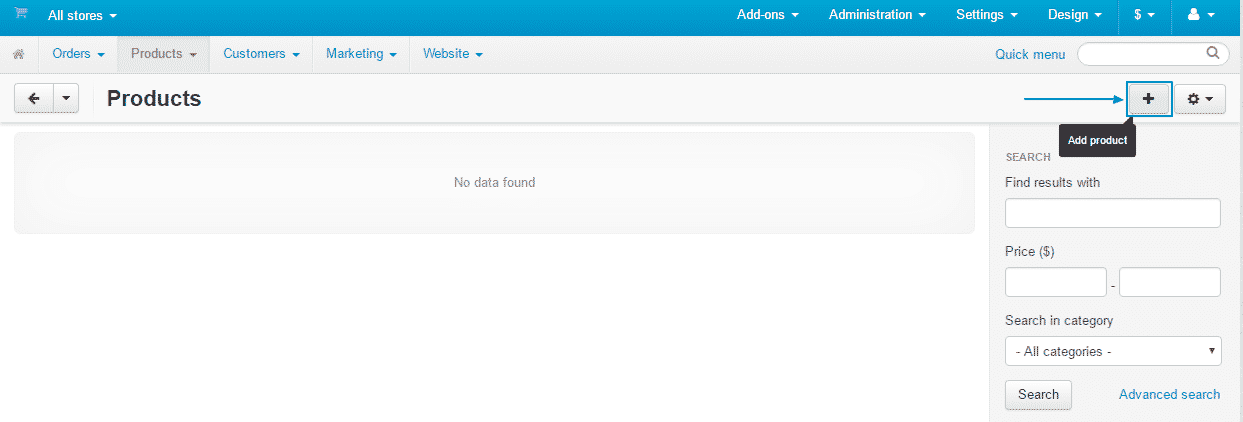
That will lead you to the Products page, where all of the currently added ones will be displayed. For this tutorial, we are using a fresh installation with no previously added products, as seen on the screenshot. You can add a new one by clicking the Add product button at the top right corner of the page:
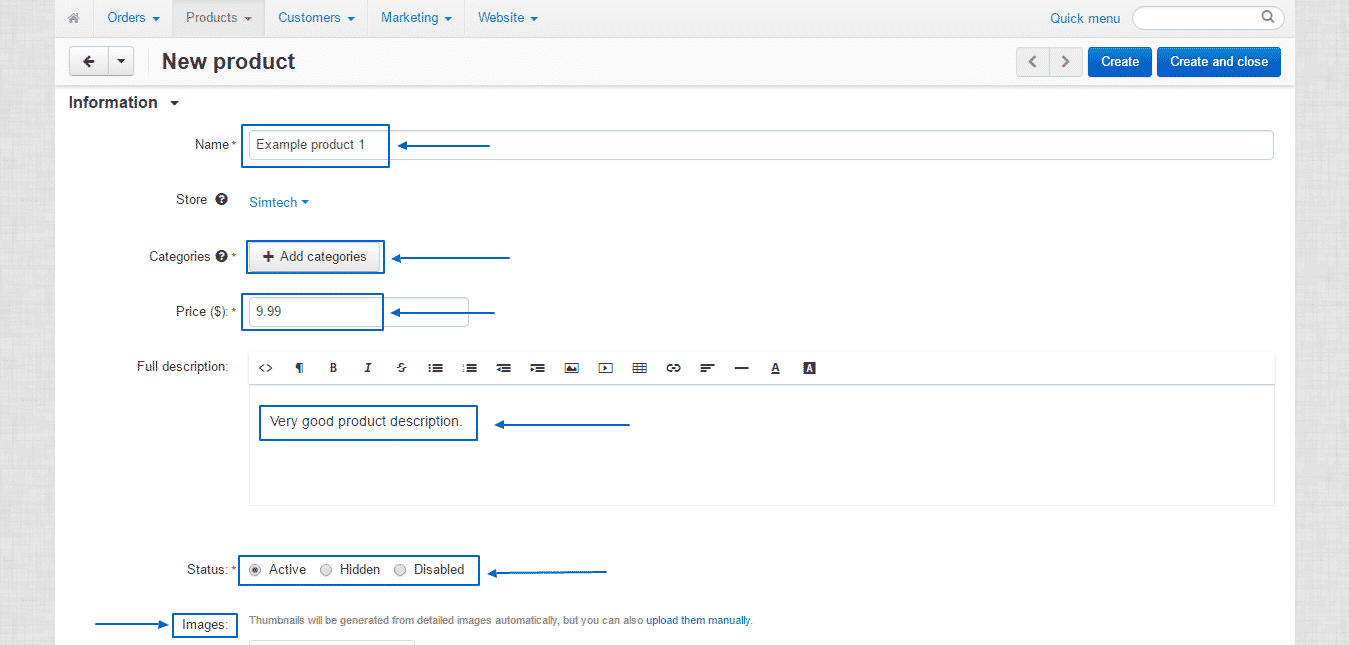
This button will get you to the New product page, where you have to make sure you have filled in all the mandatory fields with the Name of the product, its Price as well as the Status you want to assign to it. Not obligatory but highly recommended is the Full description field as well as attaching an image. Another requirement is to choose a category. You can do that by clicking on Add categories:
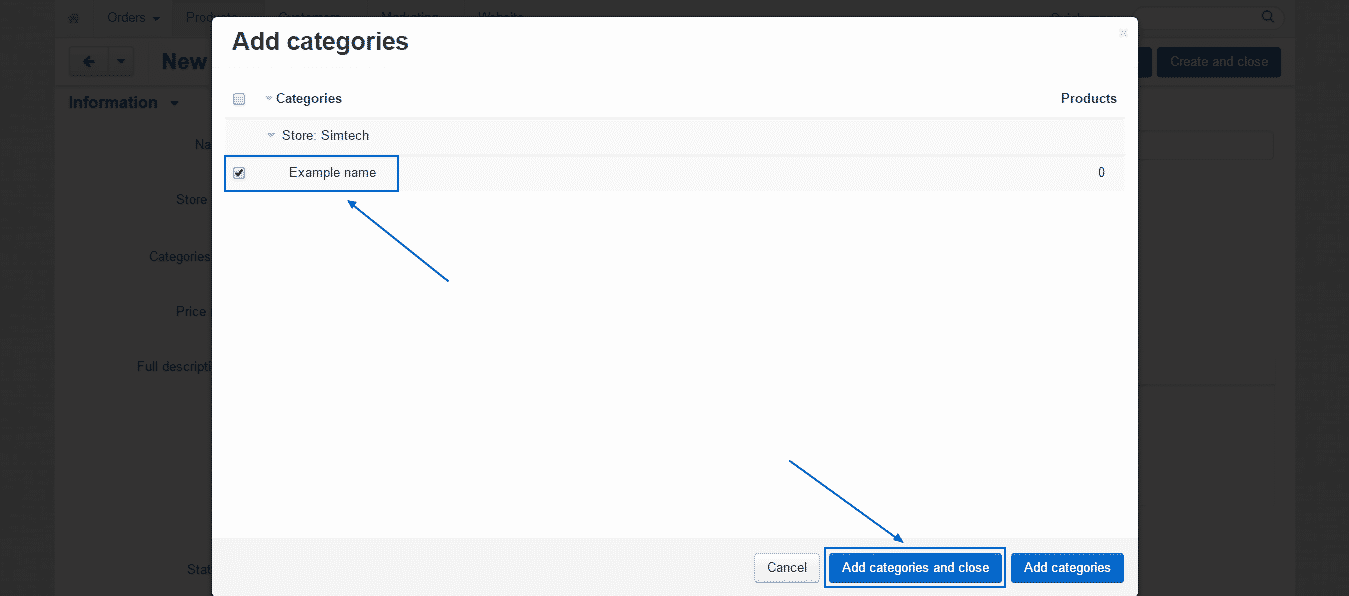
You will then see a page, where you will be able to choose which category to assign the product to. In this example, we are going to use the only category – Example name – which we created earlier. Then click on Add categories and close, to save the changes and go back to the previous page:
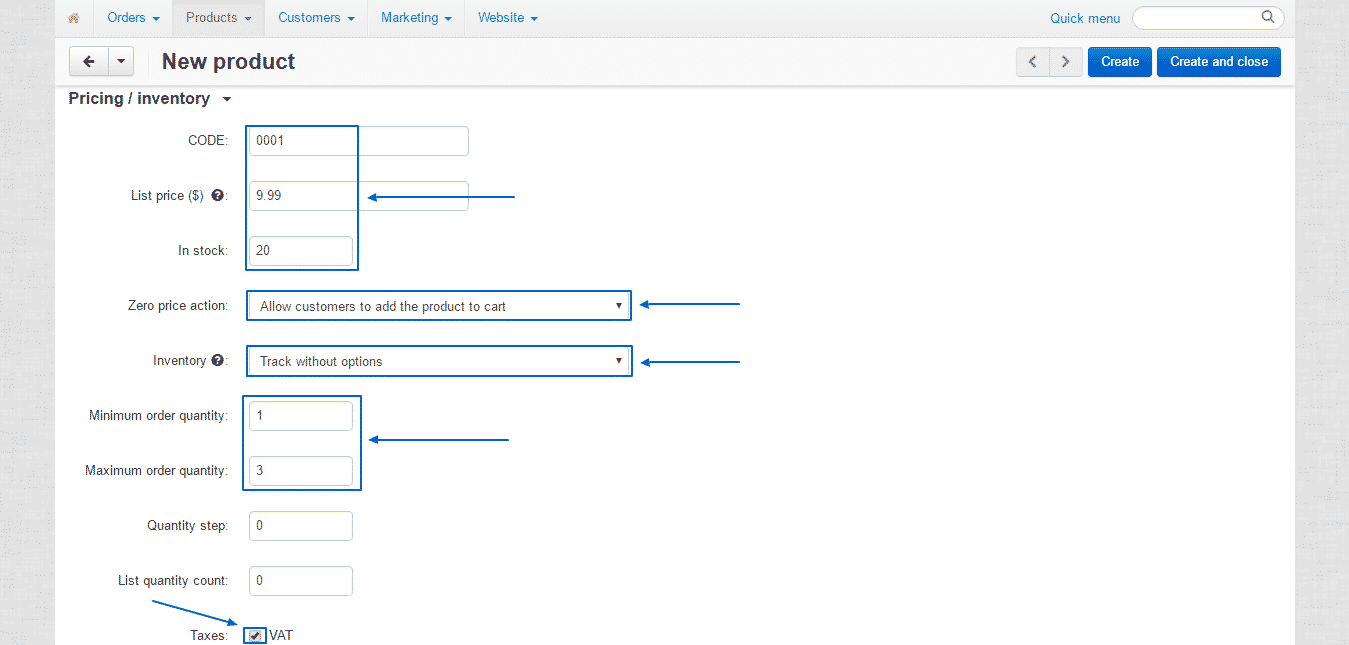
When you continue to scroll down, you will see the Pricing / Inventory section, where the script does not mandate a definite requirement to fill in information to proceed with adding the product, but it is highly advisable to do so if you wish to manage your online shop professionally.
At the top of this section, you can add:
CODE – the internal code you choose to assign to your products.
List price – the manufacturer’s suggested retail price.
In stock – the quantity of the item in question you have.
Below that, you can set one of the available options from their respective drop down menus:
Zero price action – what to be the action when the price of a certain product drops to zero.
Inventory – enable/disable keeping track of the product’s quantity.
Further down, you may include a minimum as well as maximum order quantity requirement, as well as indicate if VAT is included in the price or not:
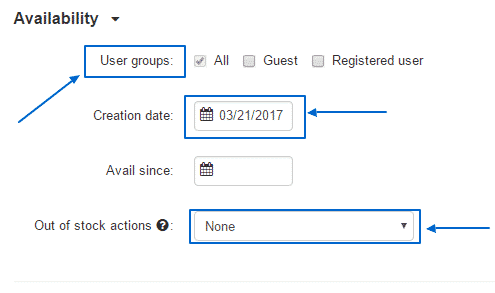
Further down, you will find the Availability settings, where you can select the User groups, for which the certain product is going to be available, set dates and mandate a certain Out of stock action:
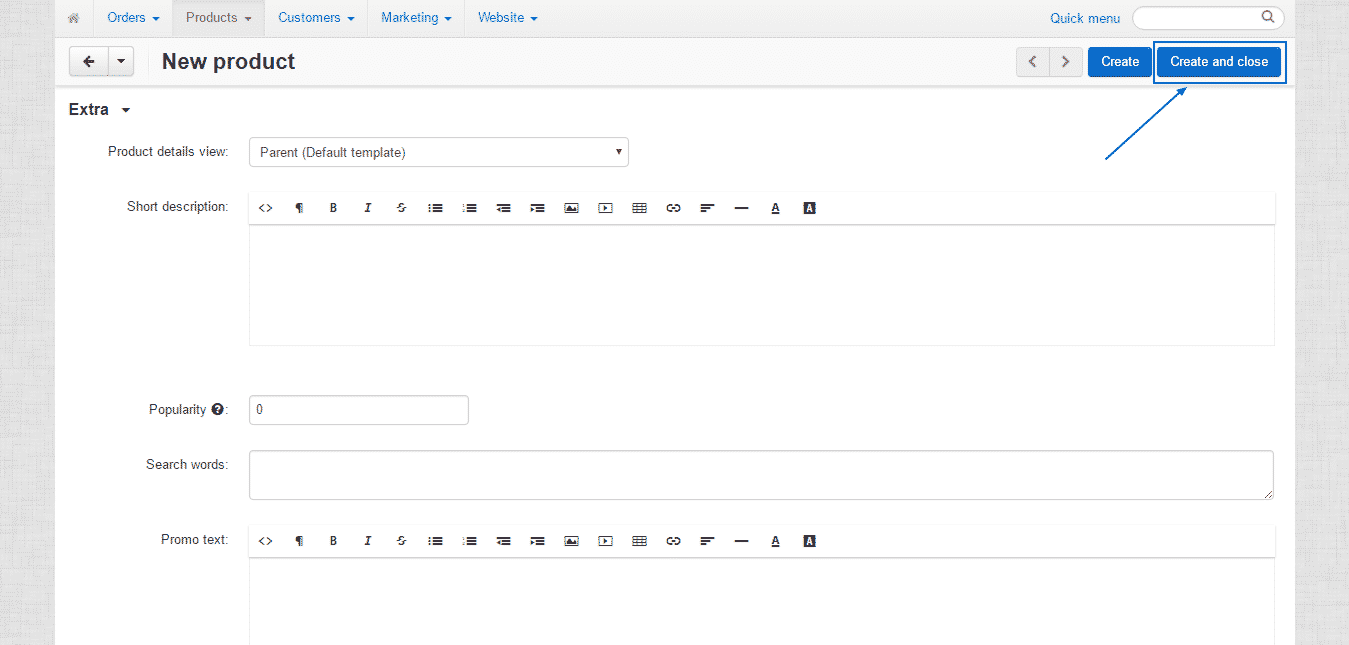
Finally, if your business needs it, you can fill in the Extra section as well and when you are finished with everything – just click on Create and close, in order to save everything so far and go to the previous page:
Back on the Products page, the newly created product will be visible, together with all of the other products, created before that. If you need to change any of the information about this or any other product, you just need to click on its name and it will lead you to the page with all the details, we just covered:

There is, however, another way for creating new products, which we mentioned in our Categories Management section. To do that, you just need to go to Products > Categories:

When you are there, you will be able to see all the Categories currently available. You simply need to go to the right of the category, where you want to create your product in, select the gear button and then click on Add product, which will lead you to the exact same page for product creation, which we covered above, but with the only difference being that the category is already assigned:

