With this Coppermine hosting package
you will never be on your own. Our expert Coppermine technical support team will make sure that you have a bug-free and secure Coppermine installation in less than 10 minutes, complete free of charge. The Coppermine installation can be requested from the client’s area -> Get Support section -> Submit Support Ticket.
Coppermine gallery can be installed in just a few clicks via your cPanel -> Softaculous auto installer. First, you should login your cPanel accessible via https://yourdomain/cpanel. Once you are in your cPanel, look for the Softaculous icon, located under the “Software” section:

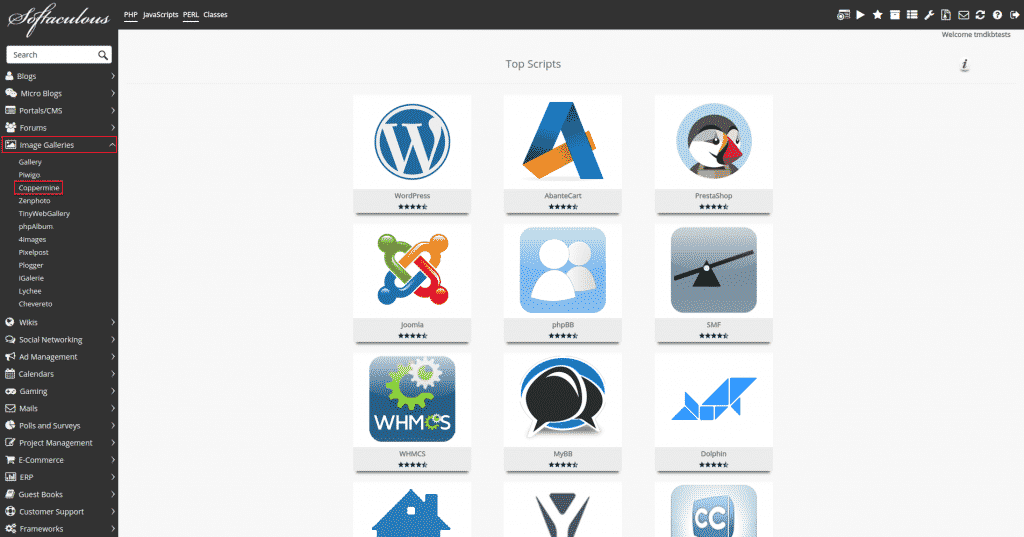
Clicking on it will introduce you to the Softaculous main page. There, navigate to the Image Galleries and click on Coppermine:

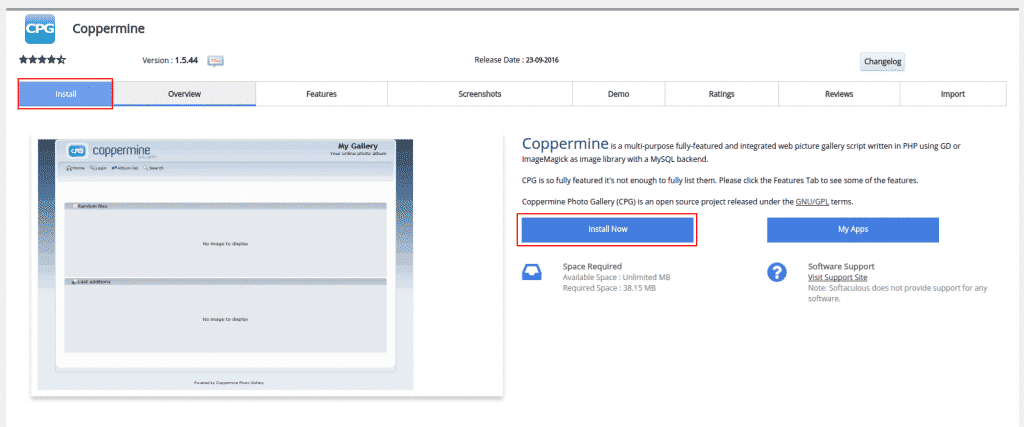
This will redirect you to the overview page of the application. To install it you will need to click either on the Install tab or on the Install Now button:

On this step you will need to choose the protocol you want to use (http or https), the domain name and the exact directory under which you want to install Coppermine:

In our example below, we are installing Coppermine in a folder named “cpg”, under the tmd-kb-tests.com domain, so it will be available at www.tmd-kb-tests.com/cpg when finally installed.
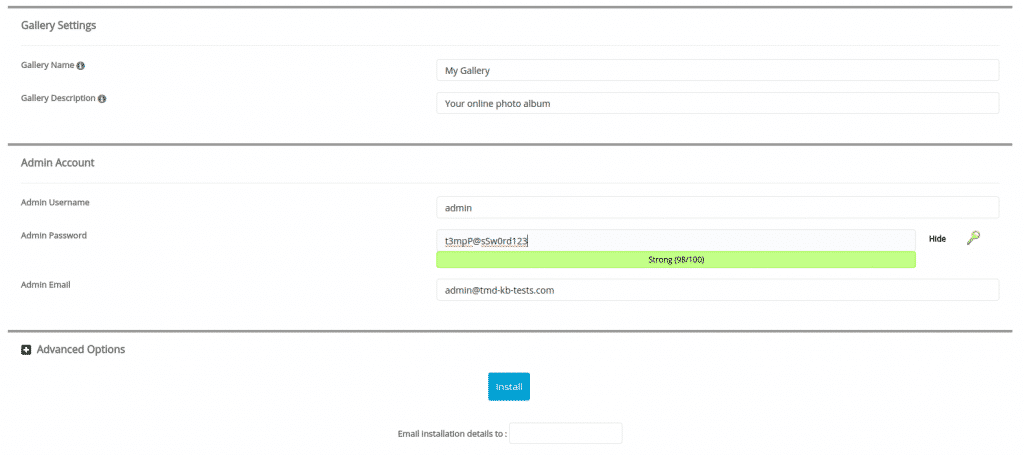
Further on, you will need to apply the following details for your Coppermine application:

– Gallery Name – The name of your website
– Gallery Description – A short description on your website
– Admin Username – The username you will use to access the Dashboard of your application
– Admin Password – The password you will use to access the Dashboard of your application (Please change the default one to a string that is secure enough and still easy to remember)
– Admin Email – The administrative email you will use for your application (Please provide a valid email address because you might need to use it later)
– Language – The language of your application
As soon as you are ready filling these details, please run once again trough the whole page, making sure you have filed the correct details and write the most important down. Once you do so, you are ready to proceed.
Now fill in the email account on which you would like to receive the installation details and click on the Install button.
You will need to wait for a couple of seconds while the installation is in progress. Once it is completed you will be displayed with the frontend and administrative URLs:

