Concrete5 is an application, which offers functionality as well as very easy navigation. Here we are going to outline the ways which you need to know if you wish to change the site name or to enable full caching.
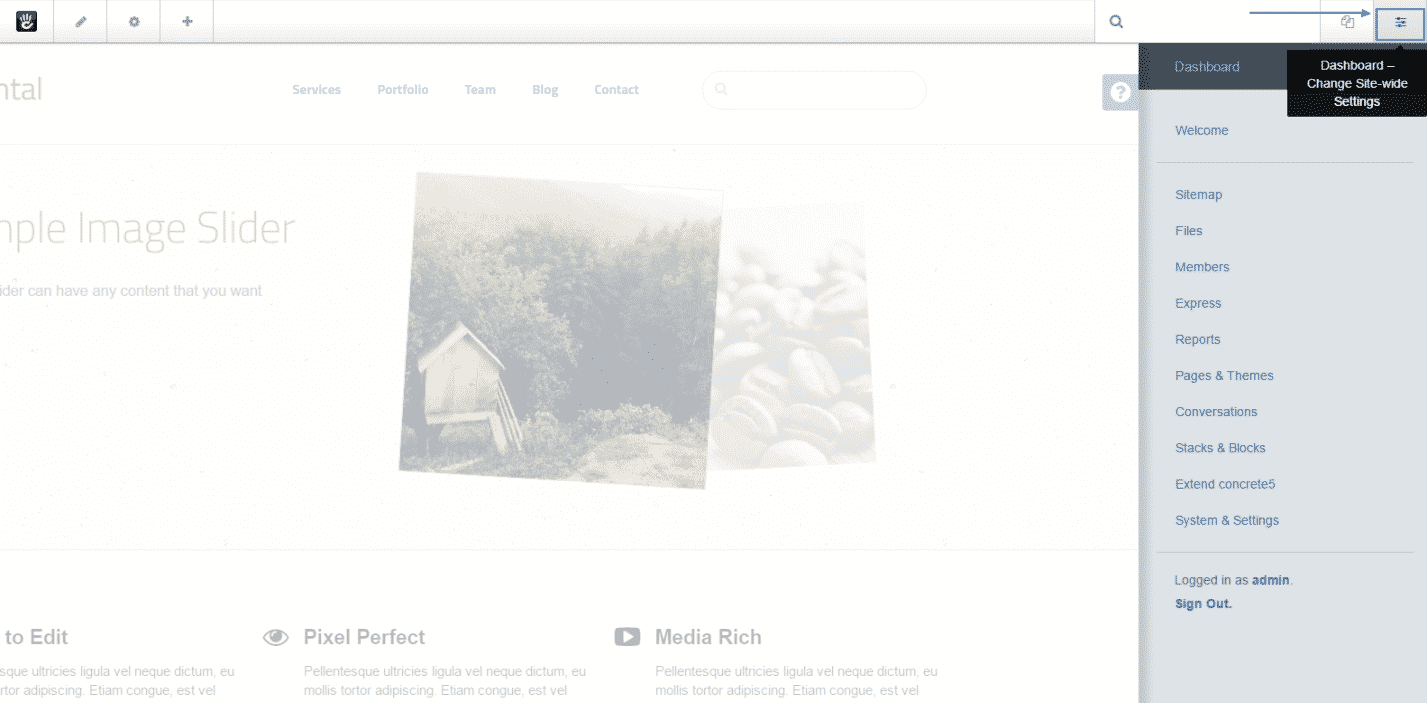
We are going to start our tutorial with the steps for changing the site name. First, you have to go to your Dashboard:
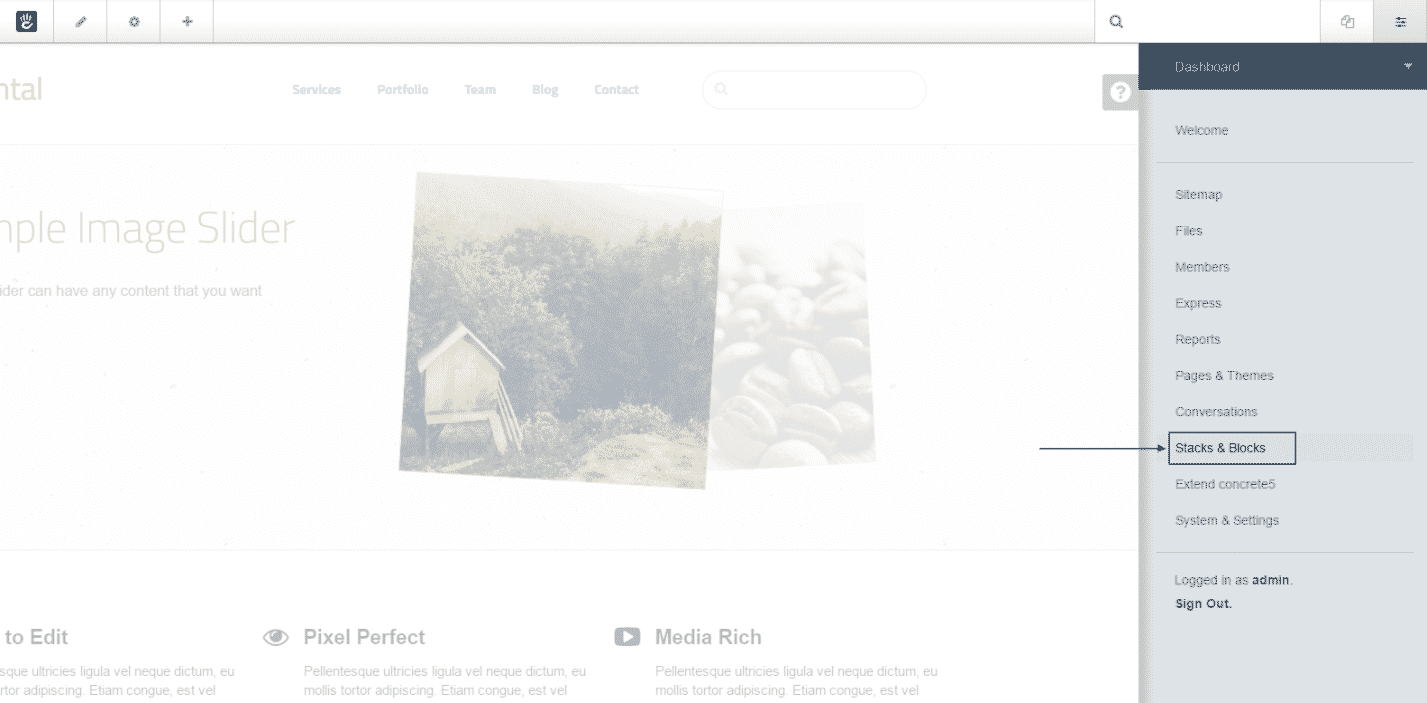
Then, in the drop-down menu on the right side you should find and select the Stacks & Blocks option:
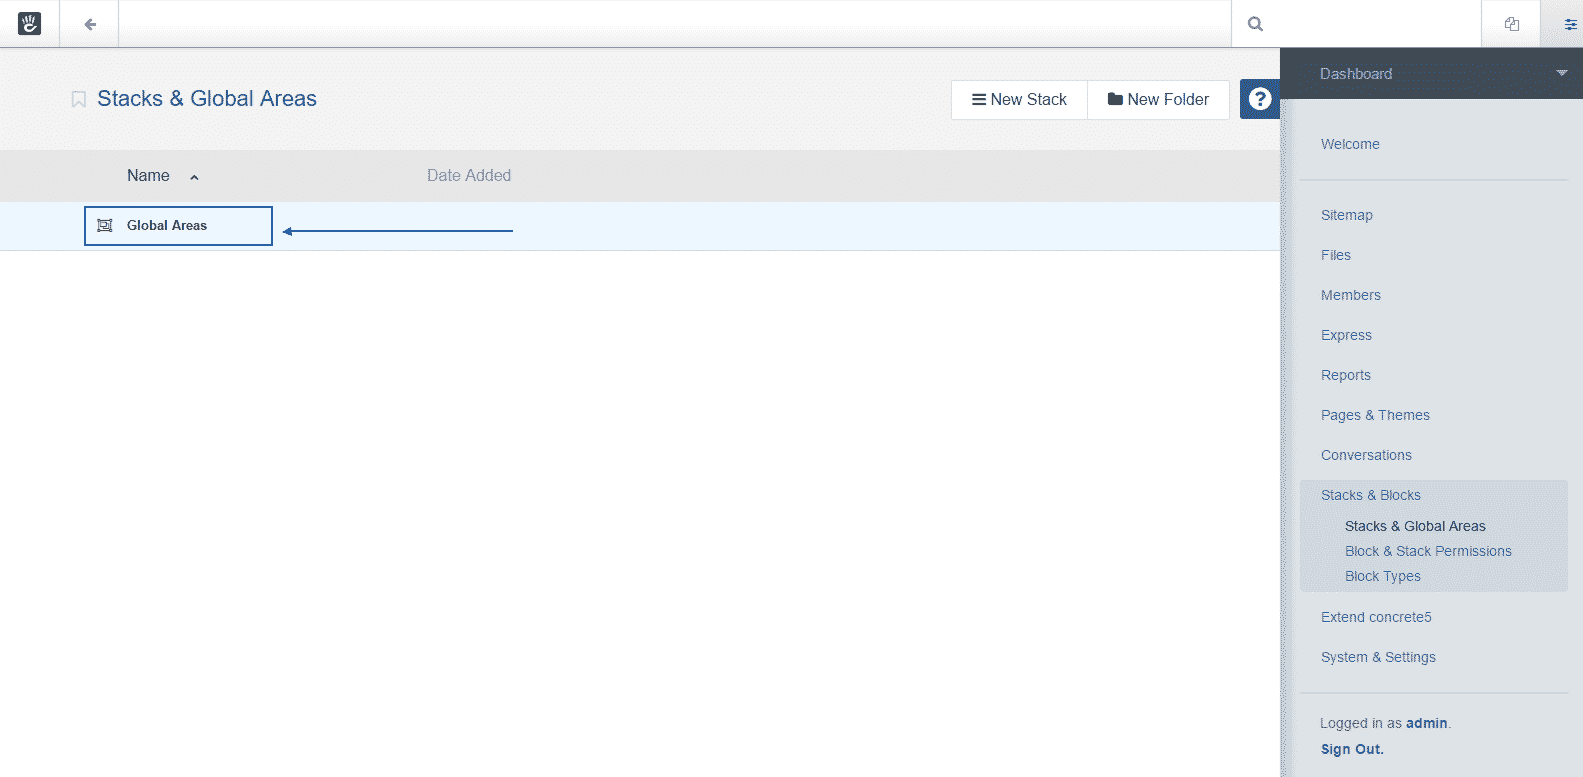
Once you are there, you need to click on the Global Areas link on the left:
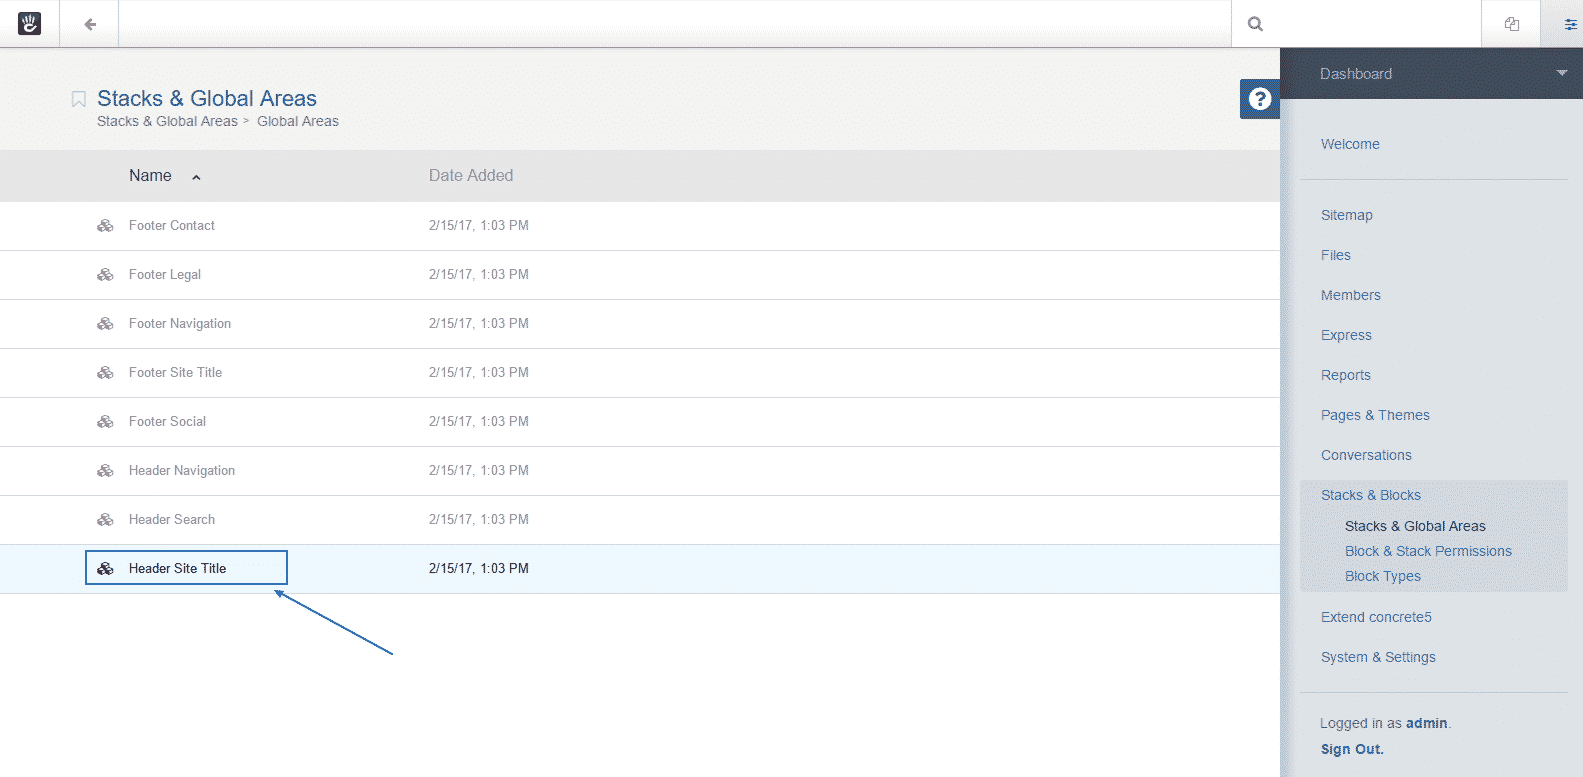
There, you will see eight options. You just have to choose the last one – Header Site Title:
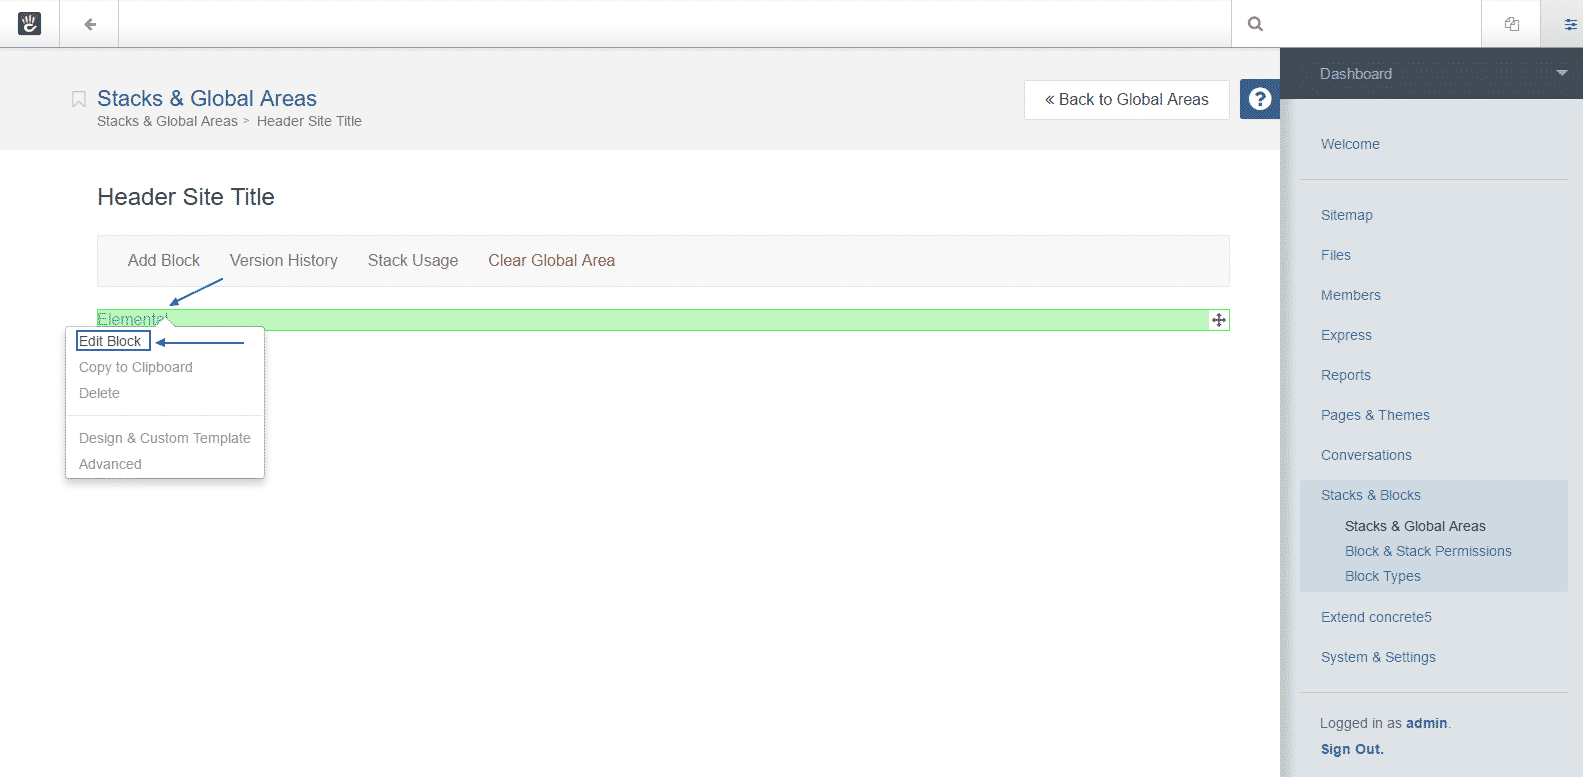
In Header Site Title you will be able to click on the current site name and choose the Edit Block option:
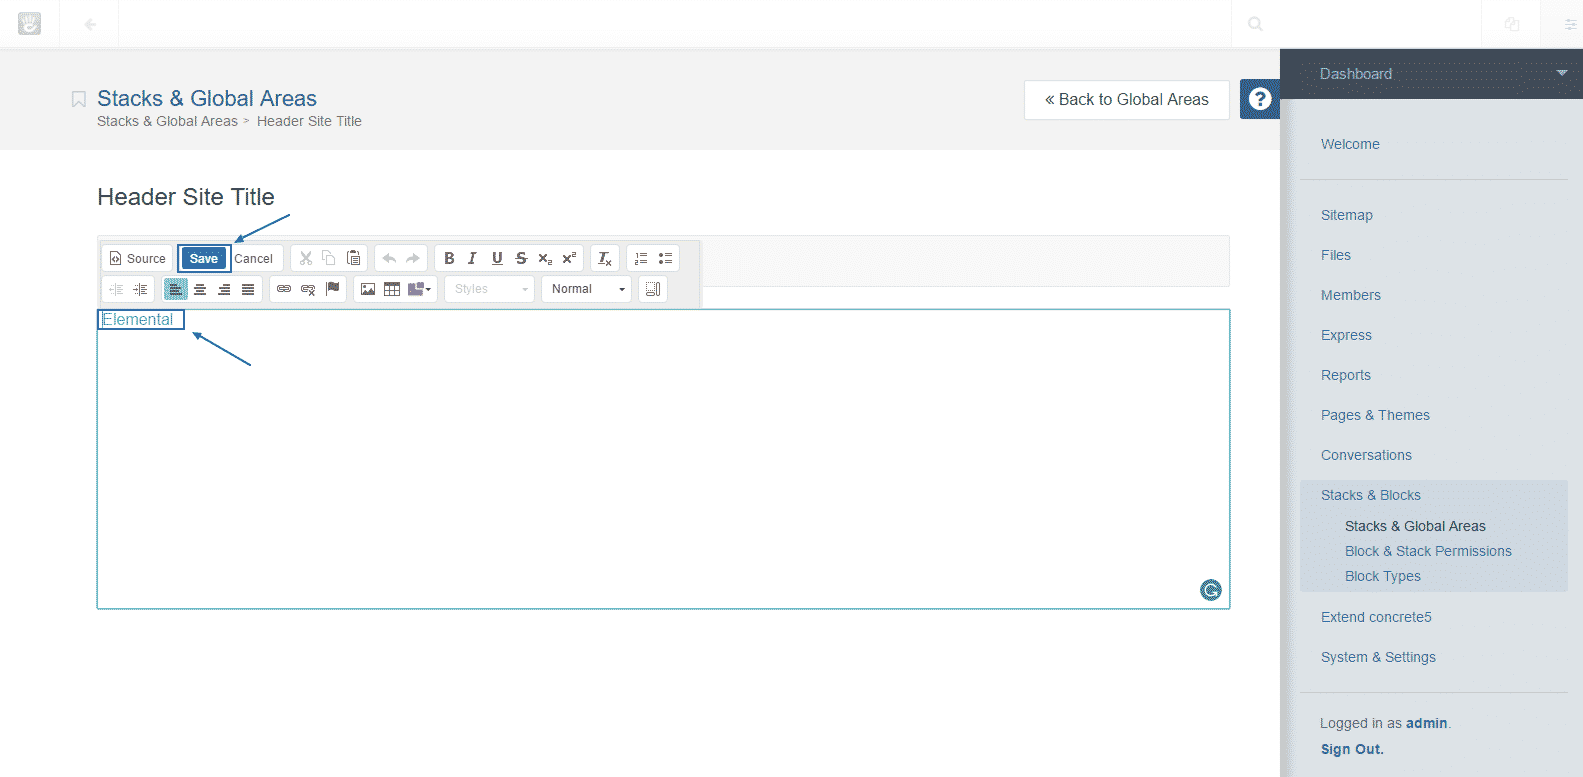
Finally, you would be able to edit the site title and when you are finished you simply need to click Save and the changes would be fully implemented:
Now that you know how to change the Site Name we would like to guide you through the Full Caching process. Your first step should be to go to the Dashboard again.
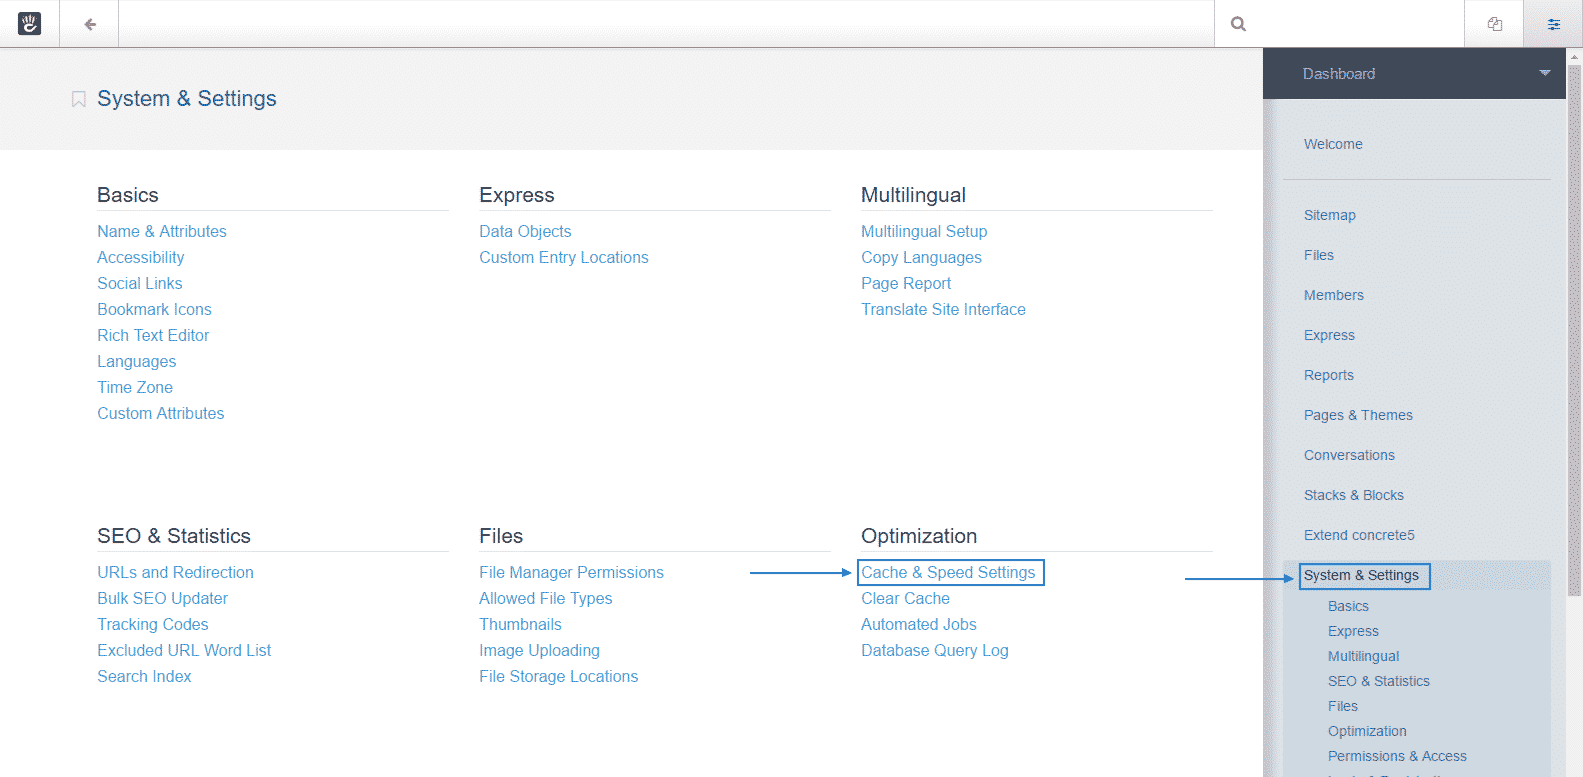
Then, navigate to System & Settings and once you are there choose the Cache & Speed settings option from the Optimization section:
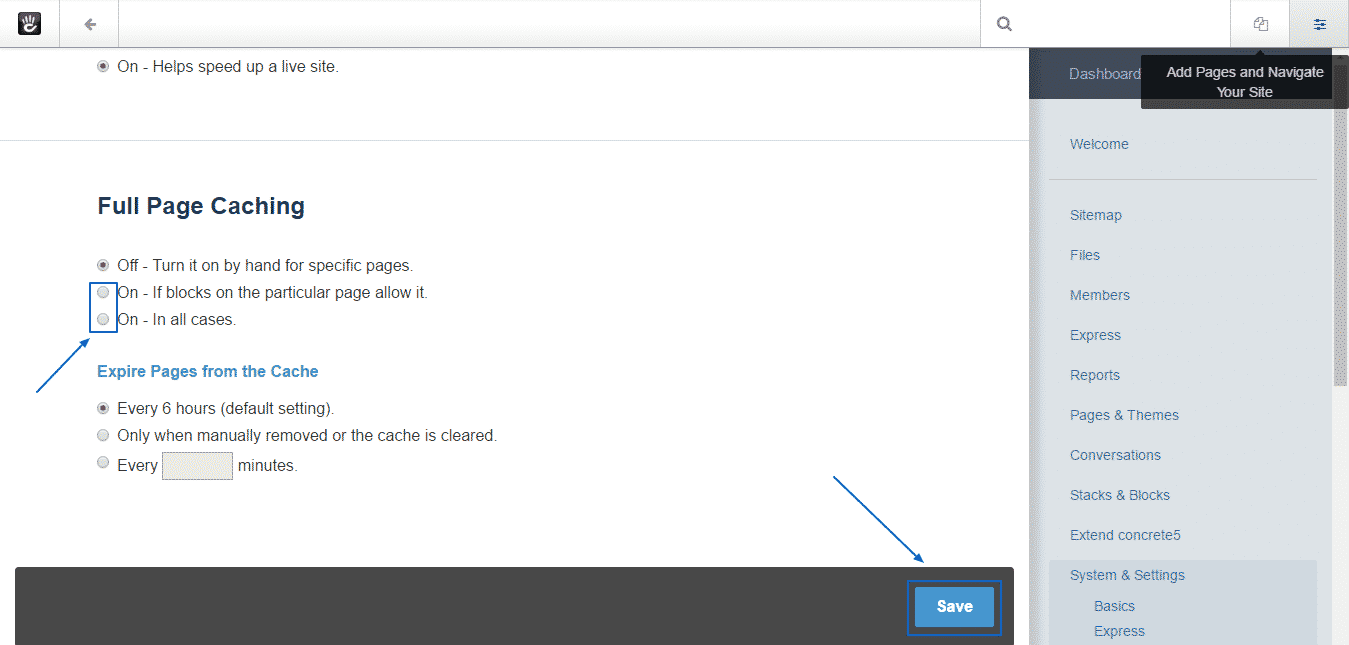
You will see a list of various options. Scroll down to the bottom and in the Full Page Caching section you are going to see the options to turn it on. As soon as you have clicked on the preferred one you just have to click on the Save button at the bottom and the procedure would be complete:
