With CMS Made Simple
you will get a variety of functionalities. Because the script’s developers have chosen to focus heavily on certain aspects in order for their product to be world-class in a single niche market, you will find that this software is perfect for building websites for small and medium sized corporations and organizations.
One of the key areas for the whole content management are the users and the groups, where they belong. CMS Made Simple will allow you to create and manage them and assign them specific permissions. This is crucially important if you, for example, need a new content to be created and uploaded to the page by a certain user, without allowing this user to have administrative access to the website.
In the part of the tutorial you are reading right now, we are about to show you how to go about managing this in your CMS Made Simple.
Your first step should be to get into your Administration Area by signing in. Then, find the User Management menu as this is where all the options we are going to cover here are located. As a beginning, go to Backend Users:
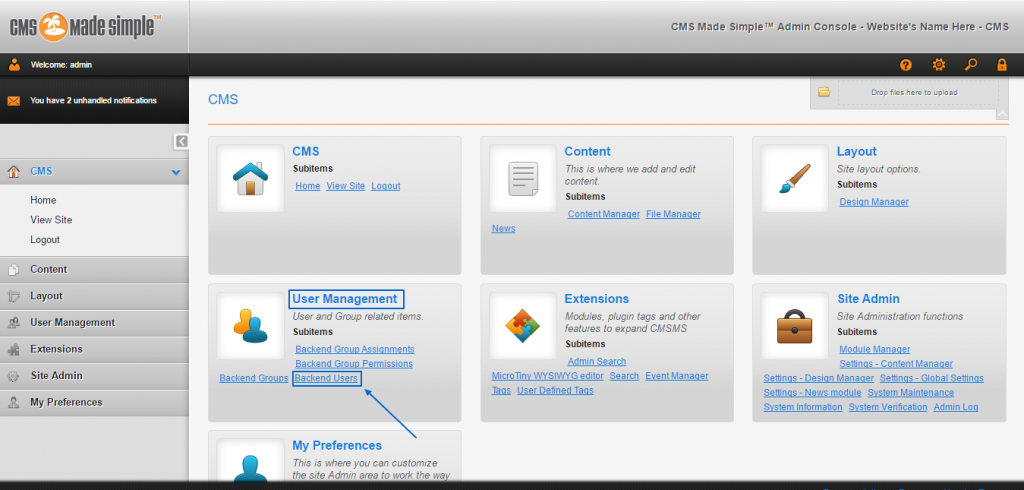
You will see a list with all of the users, registered on your CMS Made Simple here. As it is a fresh installation, we only have the default admin user, so we will just create a new one by clicking on Add New User:

This will lead you to a Profile page, where you have to fill in the required information, such as Name, Password, First and Surname, the Email of the user and tick Active of you would like for this account to be functional. Then simply press Submit and you user would be successfully created:
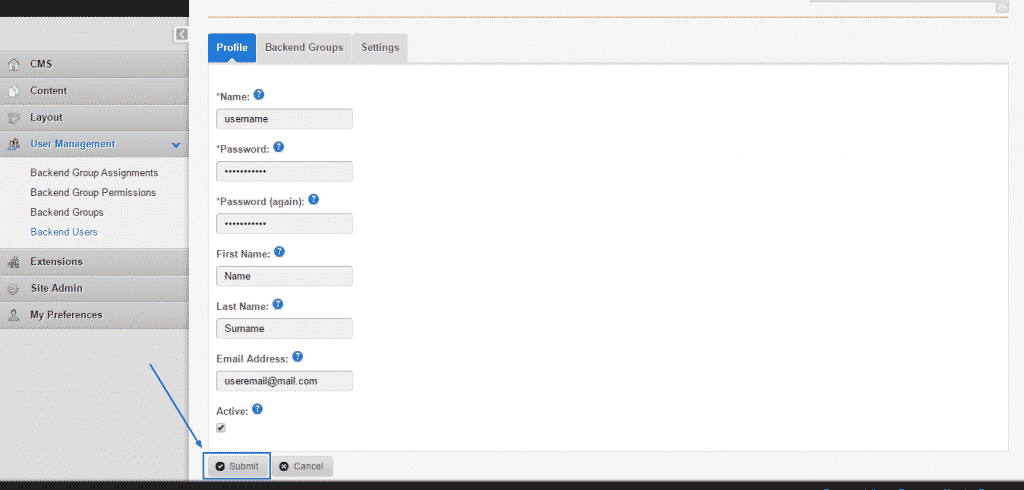
Back in the Background Users page, you will see that the new user will be active. You can change any of the just filled in details, as well as additional settings by clicking on the Edit icon at the right:

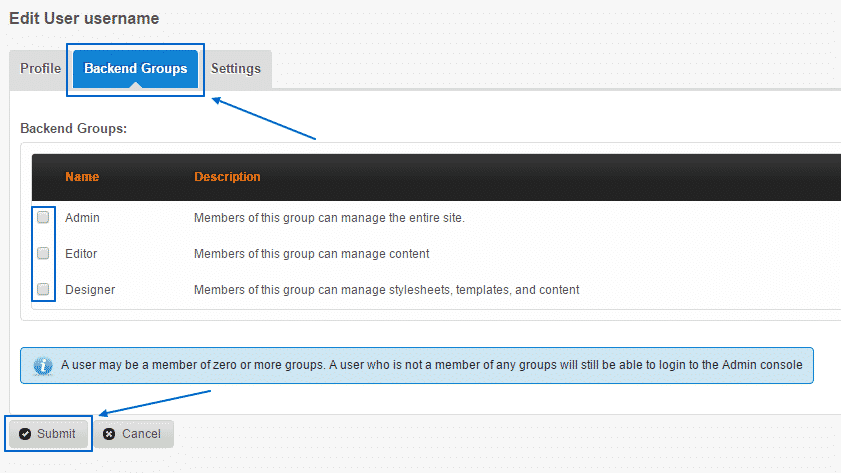
While editing, you can click on Backend Groups and assign the user to any of the available groups, by ticking the box next to the desired one/s and selecting Submit:
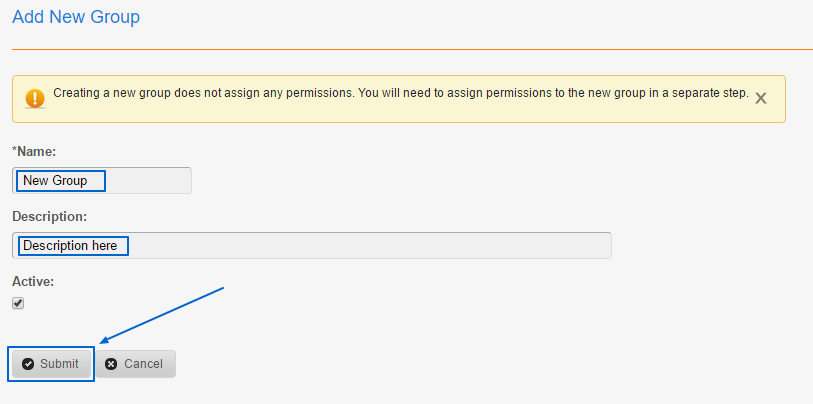
If you need to add some more groups, here is how you can do that. Go to User Management > Background Groups and select Add New Group:
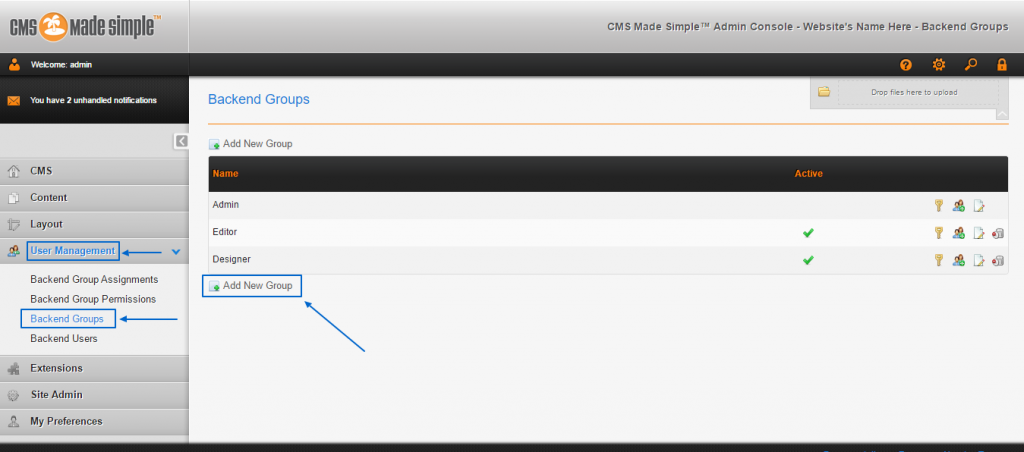
Fill in the Name and the Description, tick on the Active box and click on Submit to complete the process:
Then, you will be able to see the new group appearing with the already created ones in the Backround Groups section. If you want to give specific permissions to the members of this or any other group, simply click on the Permissions icon on their right (the one, shaped like a key):

There, you will see that you have a long page with a list of Permissions at the left and a list of all the available groups:
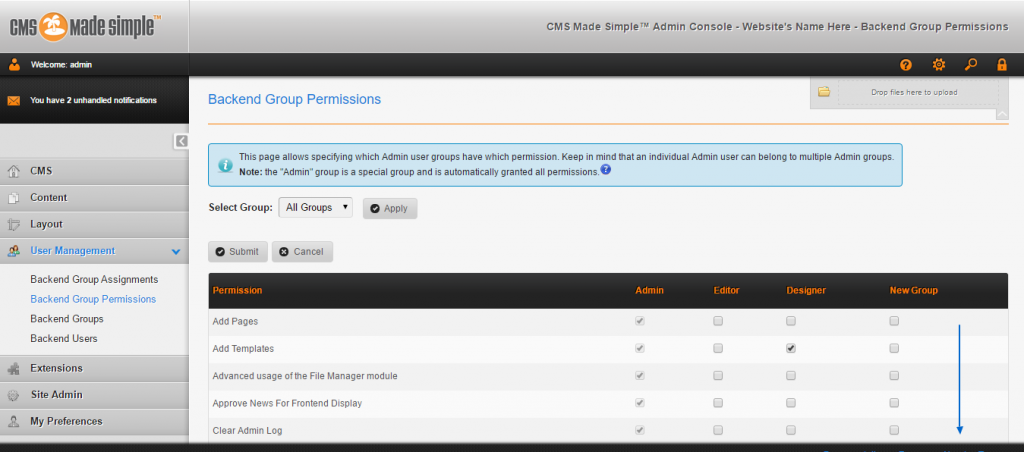
To enable/disable the access to a certain area and/or function for the members of a specific group, simply tick/untick the box, corresponding to it. When you are finished with that just click on Submit and all the changes will be enacted:

If you want to edit the details of a certain group, that is possible as well. You only need to be in the Background Groups section and click on the Edit button at the right of the chosen group:

This will get you to the same page as when you were creating a fresh group, where you can put in new Name, Description and choosing whether or not the group to be Active. You can then enact the changes by clicking on Submit:
