Sometimes, the need or necessity for changing the appearance of your CMS Made Simple website arises. In the previous part of the tutorial, we have discussed in detail how you can install a new theme, but here, we will cover the steps towards changing the different already installed themes. This procedure is actually extremely easy and requires just a couple of simple steps.
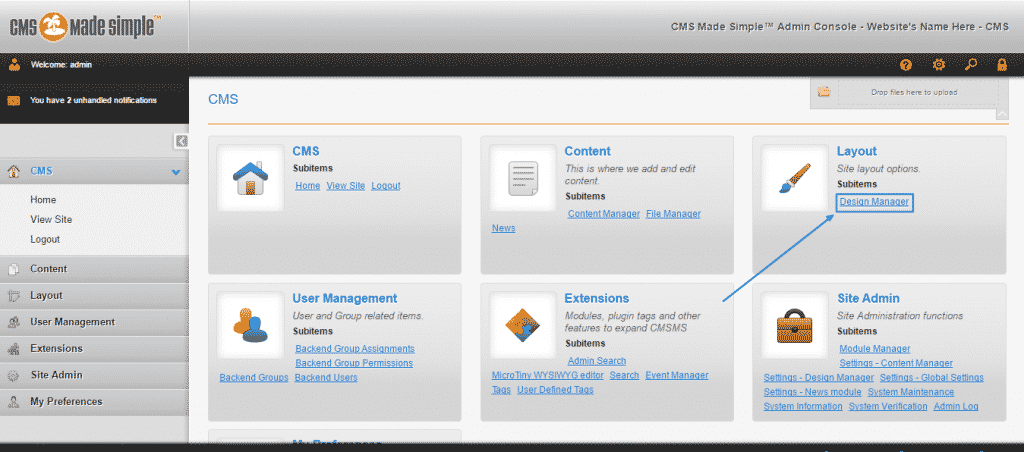
First, as in any other script management process, you are going to need to get to your Administration Area and sign in.Then, look for the Layout menu and click on the Design Manager button in it:

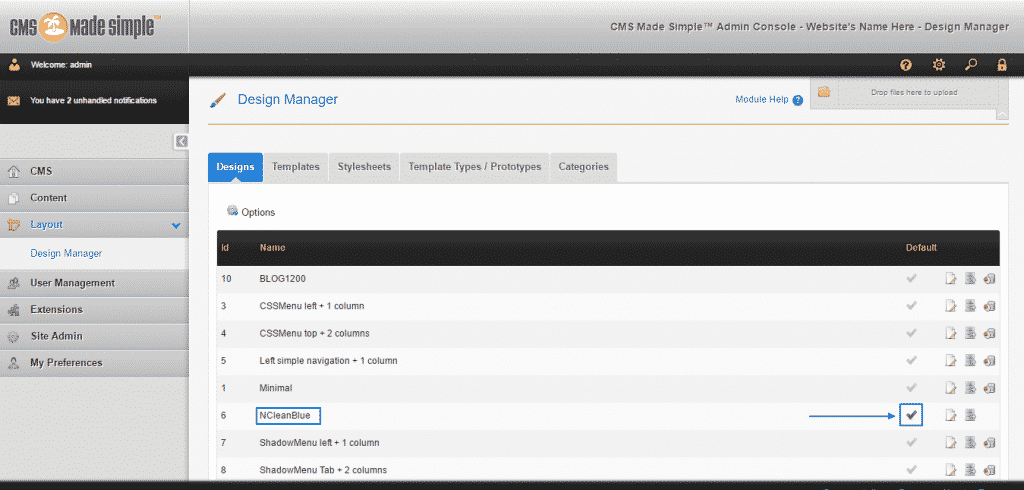
This will lead you to the Designs page of the Manager, where all the currently installed and available themes are located. You can see in our screenshot that the name of the theme we have chosen by default in this example is NCleanBlue and on its right the tick icon is the only one of all the other ticks, colored in green, which means that it is currently active:

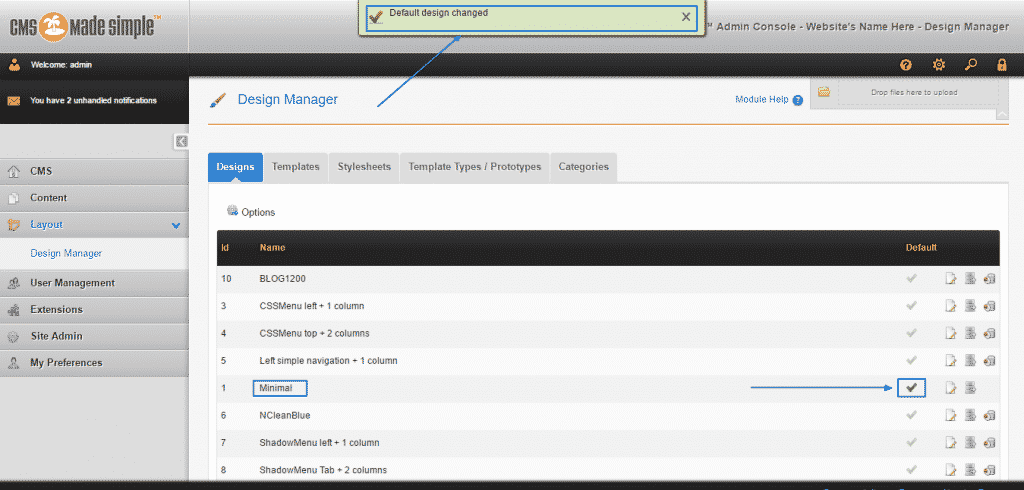
To change it, you simply have to click on the tick button of another theme. In the example below, we have selected the one named Minimal and instantly – the tick button becomes green and the message “Default design changed” appears on the top of the screen, indicating the the procedure has been successful and now the newly selected design is the active one:

