With this BuddyPress hosting package you will never be on your own. Our expert BuddyPress technical support team will make sure that you have a bug-free and secure BuddyPress installation in less than 10 minutes, complete free of charge. The BuddyPress free installation can be requested from the client’s area -> Get Support section -> Submit Support Ticket.
In this tutorial we are going to show you how to install BuddyPress. First you will need to have an active WordPress website.
We recommend using the latest stable version of WordPress to make sure you have the latest security updates.
Next you will need to download the BuddyPress plugin from their official website at:
https://buddypress.org/download/
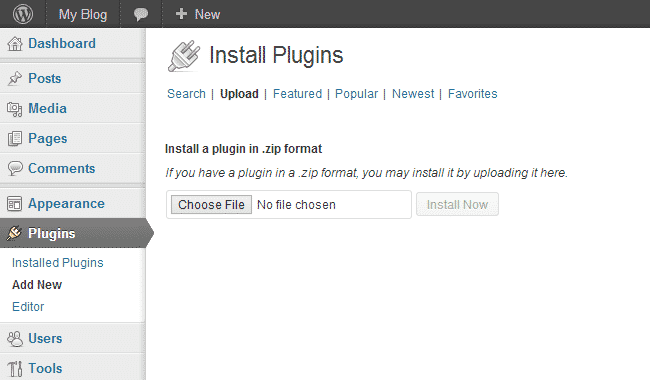
The installation of the plugin is absolutely standard. Simply login your WordPress website’s admin area and navigate to ”Plugins” ->”Add New” and select ”Upload”

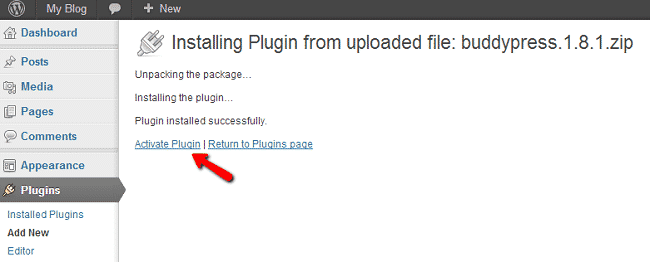
Click on the Choose File button and select the BuddyPress plugin that you downloaded earlier. Then click the install button. Once the installation is complete, click on ”Activate” button:

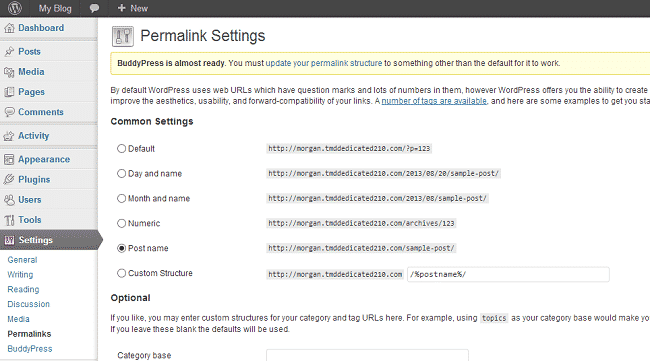
Once you have activated the plugin head to ”Settings” ->”Permalinks” and update the permalink structure to something different from the default:

Save the changes. Your BuddyPress installation has been successfully completed.
If you would like to start your BuddyPress Social Network in a few clicks, check the BuddyPress Hosting package.
